1950s Mercedes Pierburg Fuel Pump - DIY new diaphragm
Posted: Wed Dec 12, 2018 11:32 am
I've discovered recently that fuel has been leaking through to the sump of my Mercedes, via the original mechanical fuel pump. Rebuild kits can be imported at great cost and aftermarket pumps are also available, but the general problem is that the pressure of these pumps are too high, causing problems with the Solex carburetors. This necessitates the addition of a fuel pressure regulator, which means more cost, plumbing. I prefer to have original equipment in my cars, so I opened up the pump to see whether I could repair it using locally obtained material.
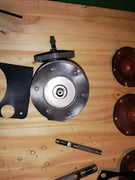
Here is the fuel pump in question:
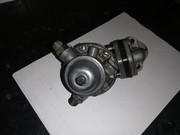
The diaphragm is the same as found in the Porsche 356A and the earlier Beetles, so the same method can be used for them. I took the original worn diaphragm to Cape Town Rubber in Paarden Eiland to get the correct material.
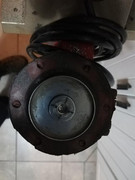
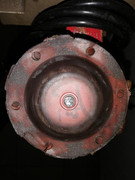
I ground off the rivet that attaches to the washer that holds the 3 diaphragm sheets together. I then tapped a 4mm hole in its place. On final assembly the rivet was replaced by a 4mm cap bolt and split washer, with a bit of loctite on the bolt.
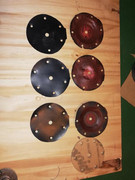
I made a cardboard template of the diaphragm sheets, which made fabrication of the new layers very easy. It was also necessary to sand down the mating surfaces of the pump on a flat surface to ensure no leaks. I've done a second pump in the meantime, and improved on some of the crudeness shown in these pictures. Based on the tests I've done there are no leaks, fuel pressure is as per spec and pump operates as it should.
The tools I used were some leather hole punches, carpet cutter, allen key.
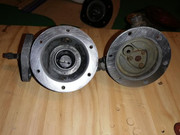
Here is the fuel pump in question:
The diaphragm is the same as found in the Porsche 356A and the earlier Beetles, so the same method can be used for them. I took the original worn diaphragm to Cape Town Rubber in Paarden Eiland to get the correct material.
I ground off the rivet that attaches to the washer that holds the 3 diaphragm sheets together. I then tapped a 4mm hole in its place. On final assembly the rivet was replaced by a 4mm cap bolt and split washer, with a bit of loctite on the bolt.
I made a cardboard template of the diaphragm sheets, which made fabrication of the new layers very easy. It was also necessary to sand down the mating surfaces of the pump on a flat surface to ensure no leaks. I've done a second pump in the meantime, and improved on some of the crudeness shown in these pictures. Based on the tests I've done there are no leaks, fuel pressure is as per spec and pump operates as it should.
The tools I used were some leather hole punches, carpet cutter, allen key.