Page 3 of 8
Re: My 1960 SO23 Westfalia
Posted: Wed Apr 08, 2020 9:38 pm
by Doekle
super cool
Re: My 1960 SO23 Westfalia
Posted: Sun Apr 26, 2020 7:14 am
by sean
AlanH wrote: Wed Apr 08, 2020 3:41 pm
Wow, you are moving. Nice. well done.
I managed to break my second baby grinder today while cleaning paint and rust of my Westy bumper.
If you want to replace with a quality item, Metabo is the only brand to consider when it comes to grinders.
I have grinders at work that have to run a constant 9 hours a day and I've tried many brands, but the Metabo outlasts by far. I'm on 5 years with some of them and they only need the regular brushes replacement.
Re: My 1960 SO23 Westfalia
Posted: Sun Apr 26, 2020 8:52 am
by sean
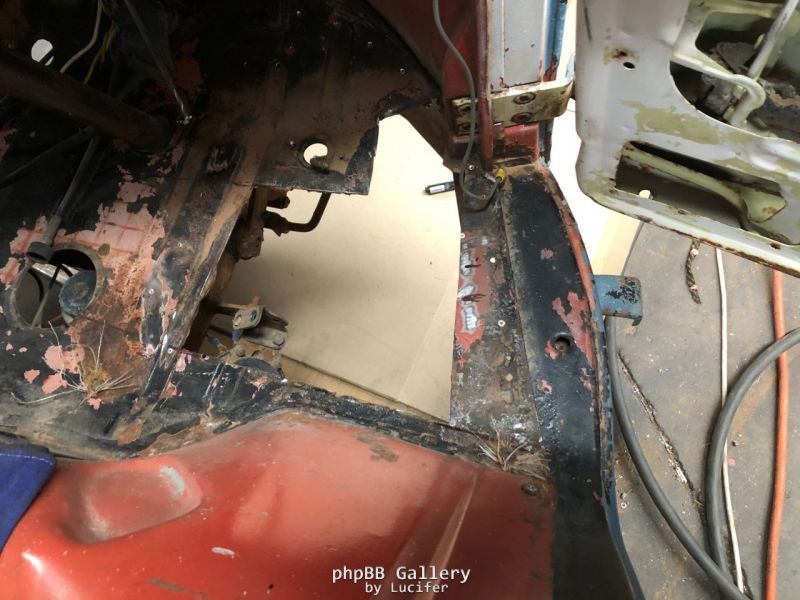
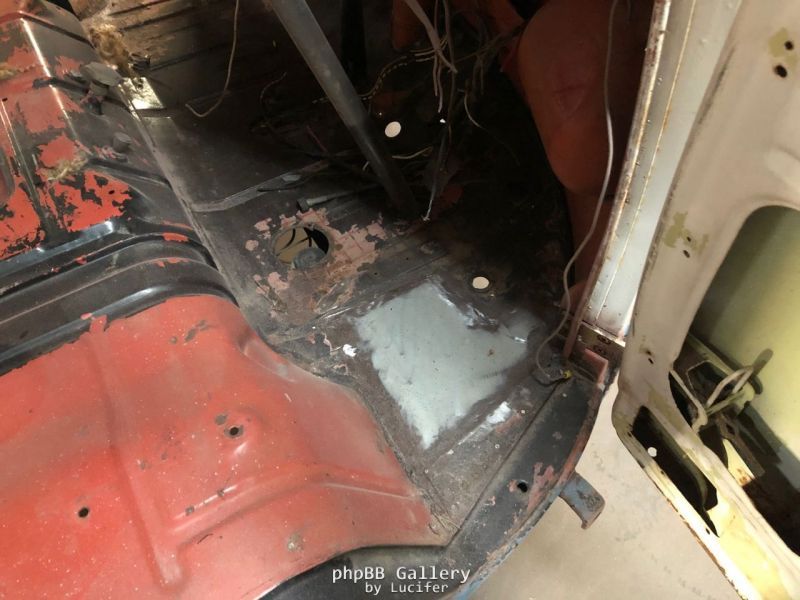
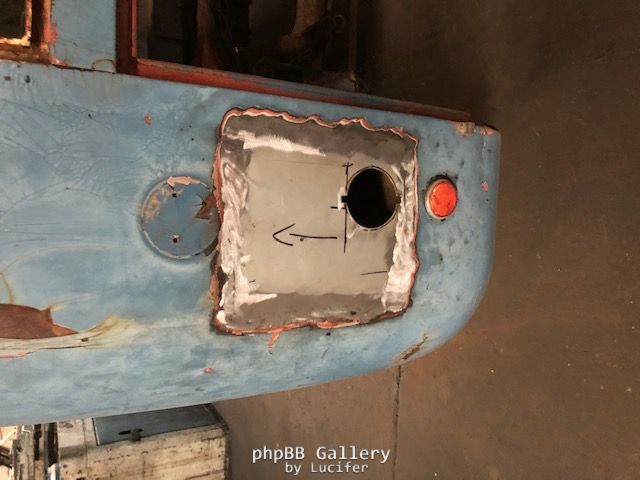
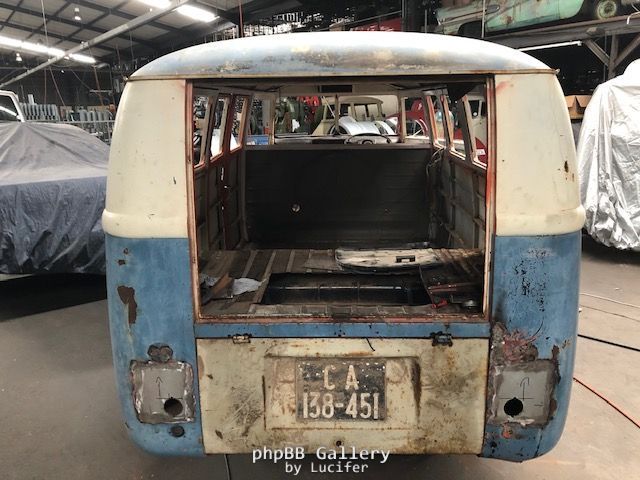
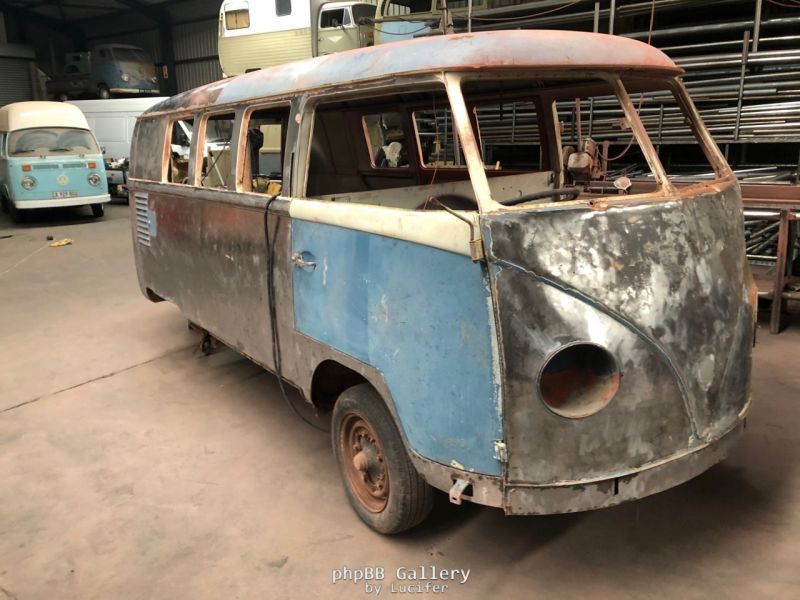
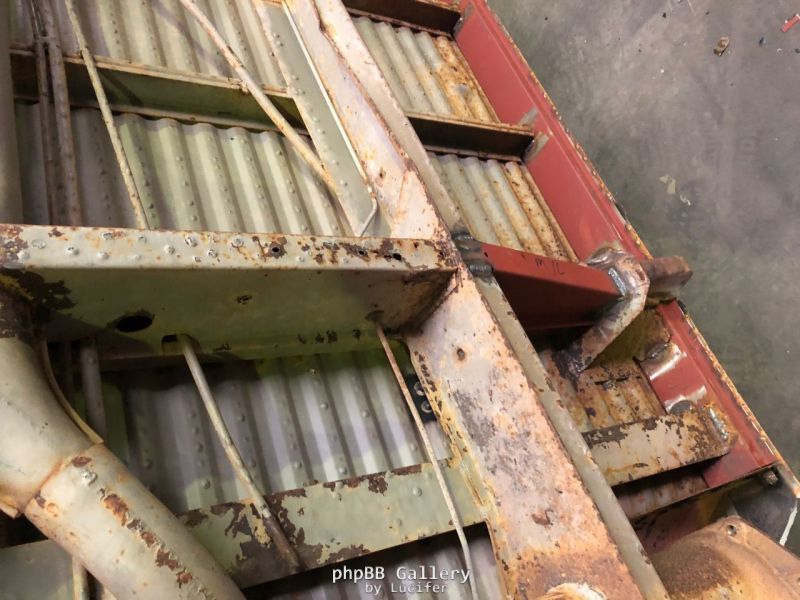
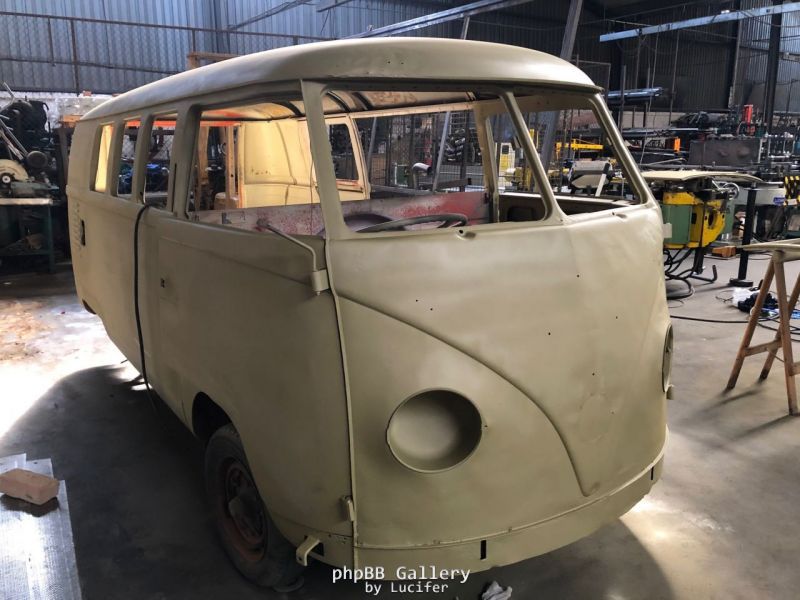
More hacked area's to repair. It appears it must have had a watercooled conversion in some point of its life.
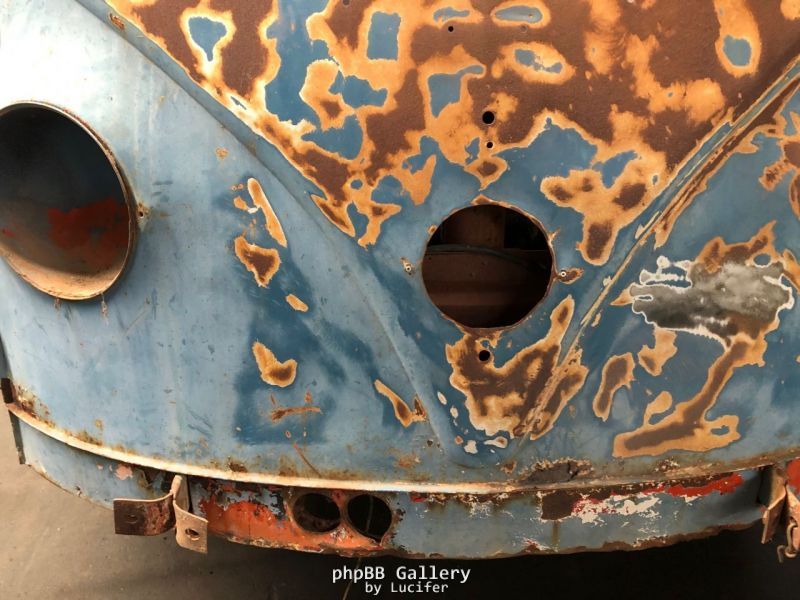
Removed dodgy section of front floor.

Rear tail lights hackjob being welded up.
Test fitting donor engine lid. The one on the bus was a replacement from a very late model split, so could not remain with its incorrect catch.
The RHS rear end of the bus has had a knock and will need some straitening.
Sections of engine bay being replaced that was also hacked out.
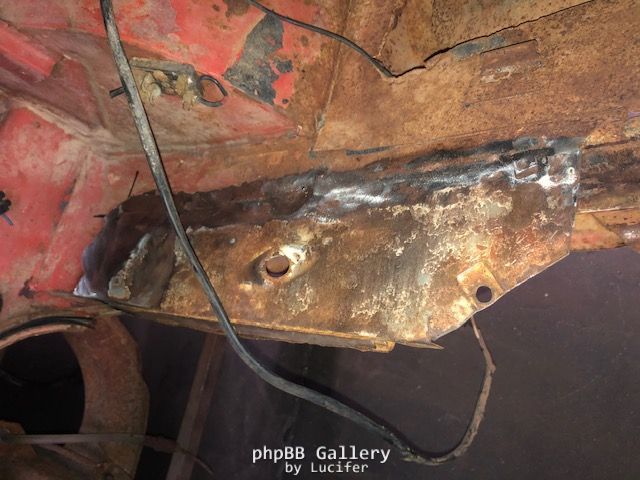
Valence mounts/brackets also been cut and installed from donor bus
Battery tray repaired

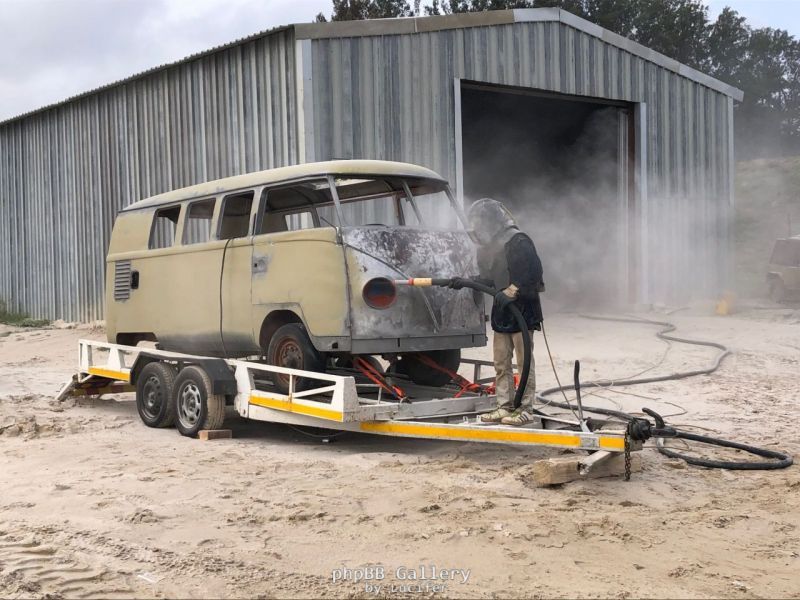
The sandblasting of the chassis and engine bay will be left until last to clean all the surface rust off as well as help remove the surface impurities on the welding as well as making a great surface for the primer to adhere to.
Re: My 1960 SO23 Westfalia
Posted: Sun Apr 26, 2020 9:04 am
by sean
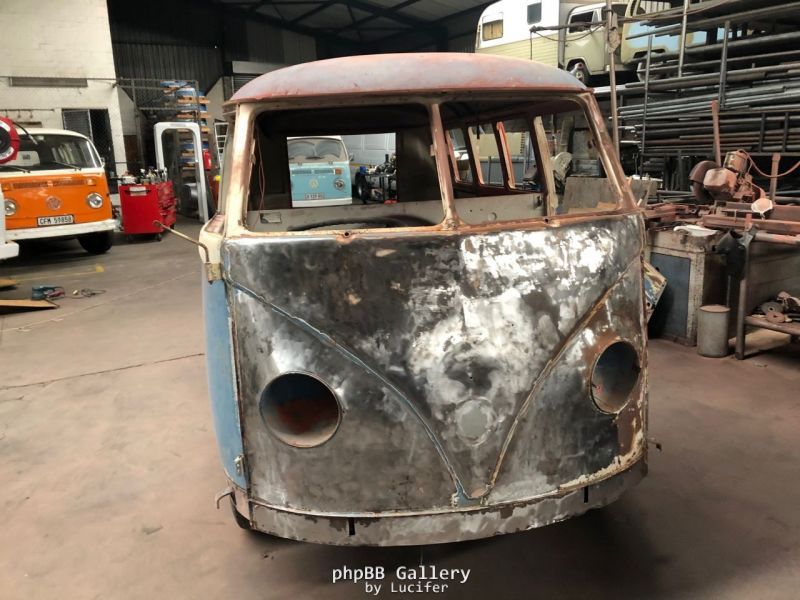
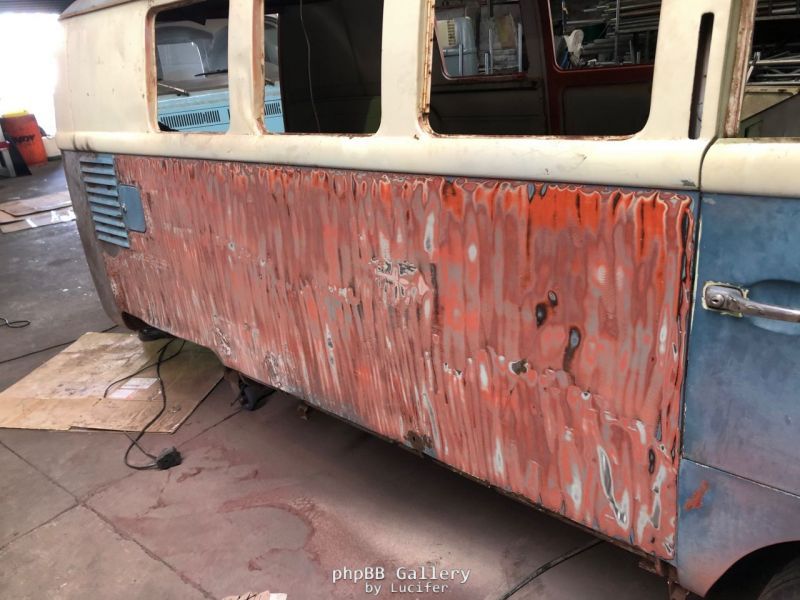
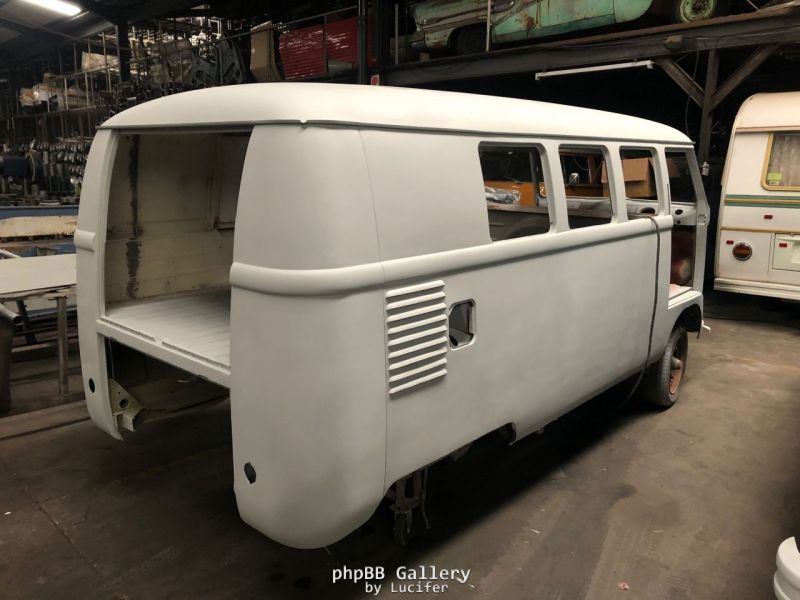
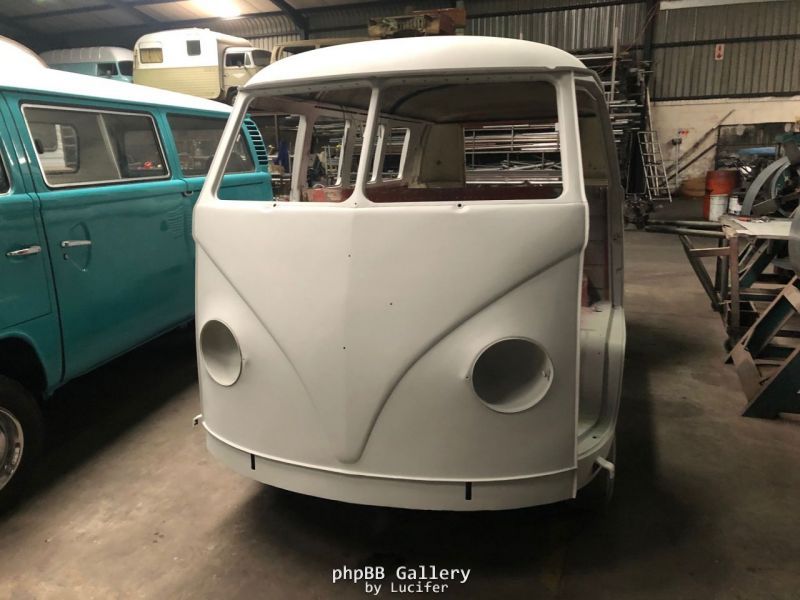
Now onto the paint stripping.
This is the best method I have found without doing damage to the panels.
I have been using a nylon fleece sanding / paint stripping disk on a grinder. I went through 4 of the disks to strip the entire bus. The disk is completely non abrasive or damaging to the metal but strips off paint. No sparks are thrown out either compared to using a normal sanding / grinding disk.
Stripping the multiple layers of paint off, easily 7 or 8 layers of different colours.
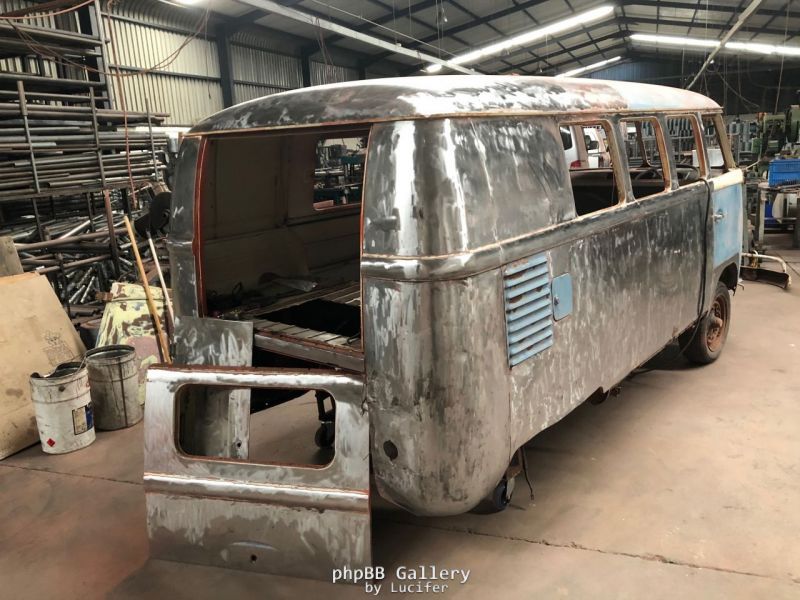
Once this is completely finished I will give it a once over with the orbital sander to equalize everything and then finalised with the sandblasting of gutters, channels and chassis.
Re: My 1960 SO23 Westfalia
Posted: Sun Apr 26, 2020 9:09 am
by Bugger
What a find keep us posted
Sent from my SM-G965F using Tapatalk
Re: My 1960 SO23 Westfalia
Posted: Sun Apr 26, 2020 9:14 am
by sean
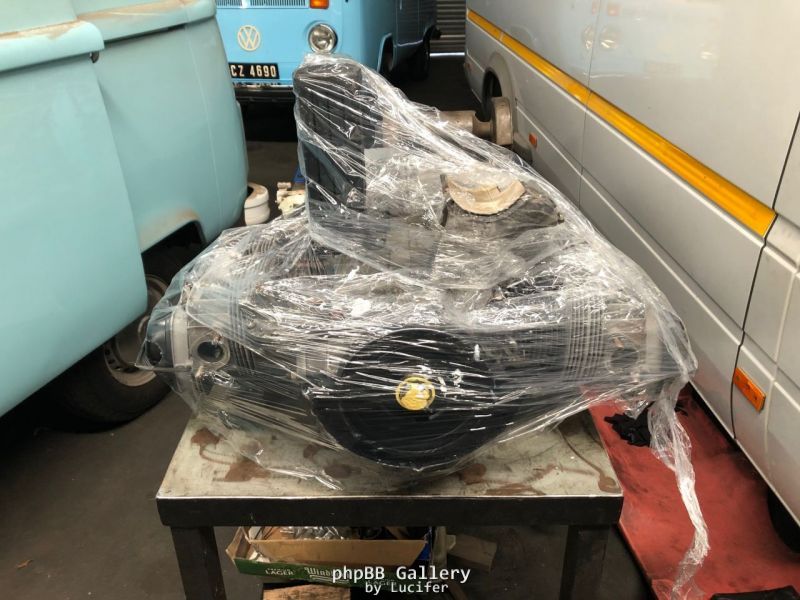
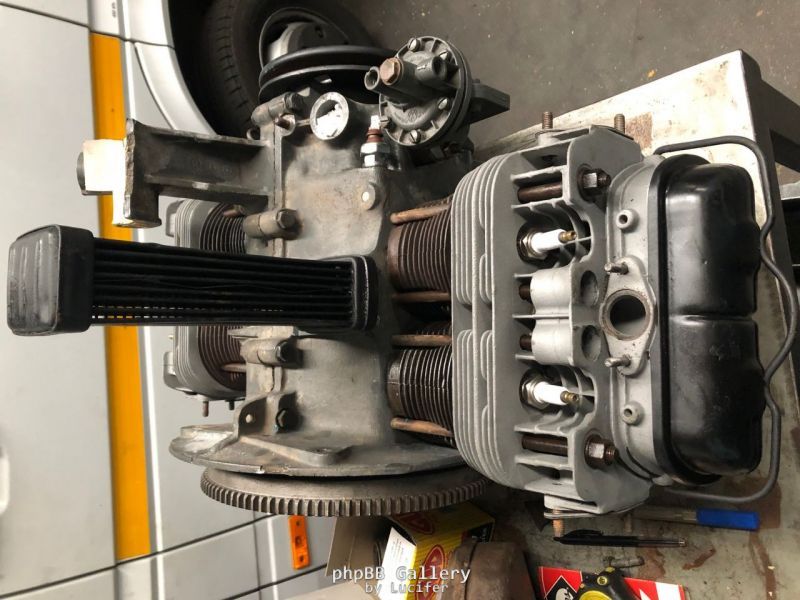
I have also collected the freshly rebuild 30hp motor from Andreno motors.
I will be assembling the ancillaries when I can get some parts back from the electroplaters and powder coaters.
The engine number has been stamped with a March 1960 code to match the month of manufacture of the bus too.
Re: My 1960 SO23 Westfalia
Posted: Sun Apr 26, 2020 10:14 am
by AlanH
sean wrote: Sun Apr 26, 2020 9:04 am
This is the best method I have found without doing damage to the panels.
I have been using a nylon fleece sanding / paint stripping disk on a grinder. I went through 4 of the disks to strip the entire bus. The disk is completely non abrasive or damaging to the metal but strips off paint. No sparks are thrown out either compared to using a normal sanding / grinding disk.
Stripping the multiple layers of paint off, easily 7 or 8 layers of different colours.
Hi Sean, awesome work.
Please could you post a picture of those nylon fleece paint stripping disks.
Re: My 1960 SO23 Westfalia
Posted: Sun Apr 26, 2020 10:17 am
by sean
AlanH wrote: Sun Apr 26, 2020 10:14 am
sean wrote: Sun Apr 26, 2020 9:04 am
This is the best method I have found without doing damage to the panels.
I have been using a nylon fleece sanding / paint stripping disk on a grinder. I went through 4 of the disks to strip the entire bus. The disk is completely non abrasive or damaging to the metal but strips off paint. No sparks are thrown out either compared to using a normal sanding / grinding disk.
Stripping the multiple layers of paint off, easily 7 or 8 layers of different colours.
Hi Sean, awesome work.
Please could you post a picture of those nylon fleece paint stripping disks.
Hi Alan
I bought them from Wurth.
Here is a link to the product.
www.wurth.co.za/products?id=11428
Re: My 1960 SO23 Westfalia
Posted: Sun Apr 26, 2020 10:23 am
by AlanH
Fantastic thanks, I think I might even have one lying around.
Found it, was for a drill but works fantastic. Thanks for the heads up.
Will get some for the grinder.
Re: My 1960 SO23 Westfalia
Posted: Sun Apr 26, 2020 12:19 pm
by Jdt1976
Good progress there.
Next time I would get the discs from Wurth when I order other items. I did not know they sell them, thanks.
Alan, I bought the other day the Norton Rapid blaze discs that is similar from Adendorf if you want to compare prices. If I remember correct paid R180 but see they list it online for R265 incl.
https://www.adendorff.co.za/product/nor ... hing-disc/
Re: My 1960 SO23 Westfalia
Posted: Sun Apr 26, 2020 12:59 pm
by AlanH
Yikes, they are more expensive than Wurth which are about R140.00 excl. ea.
Re: My 1960 SO23 Westfalia
Posted: Sun Apr 26, 2020 3:45 pm
by sean
Well, I have also found something I was looking for and couldn't remember.
Those disks differ but are for similar application. The Norton is ceramic, but Wurth one is nylon. The ceramic variety lasts longer. That's actually what I wanted but couldn't remember from where I had it before, but Wurth was also the only place I could get during lock down.
Re: My 1960 SO23 Westfalia
Posted: Mon Jul 06, 2020 9:25 pm
by sean
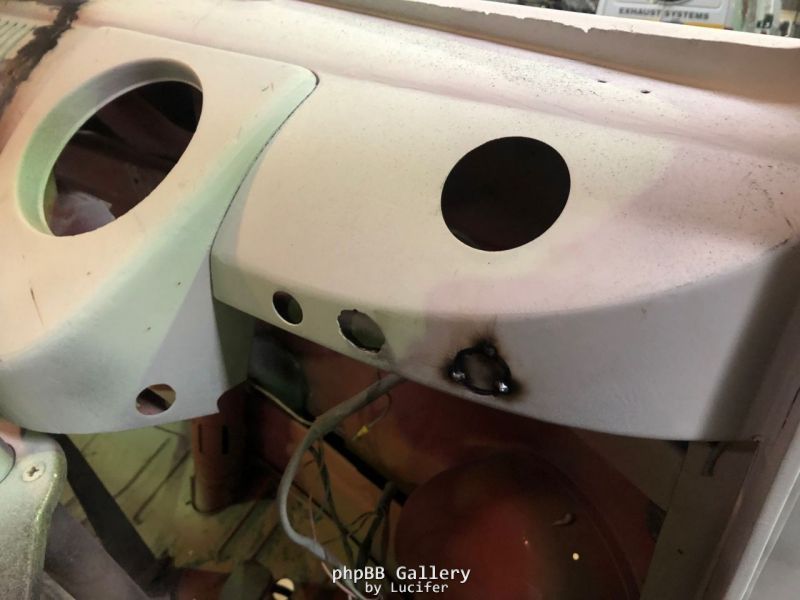
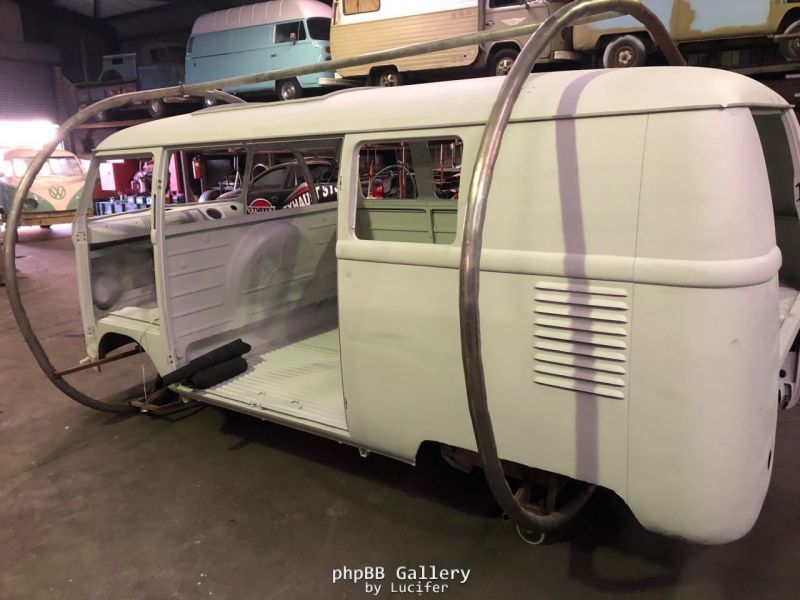
The metal work continues. Again, mostly just fixing hack jobs.
Dashboard donor cutout sourced and welded in.
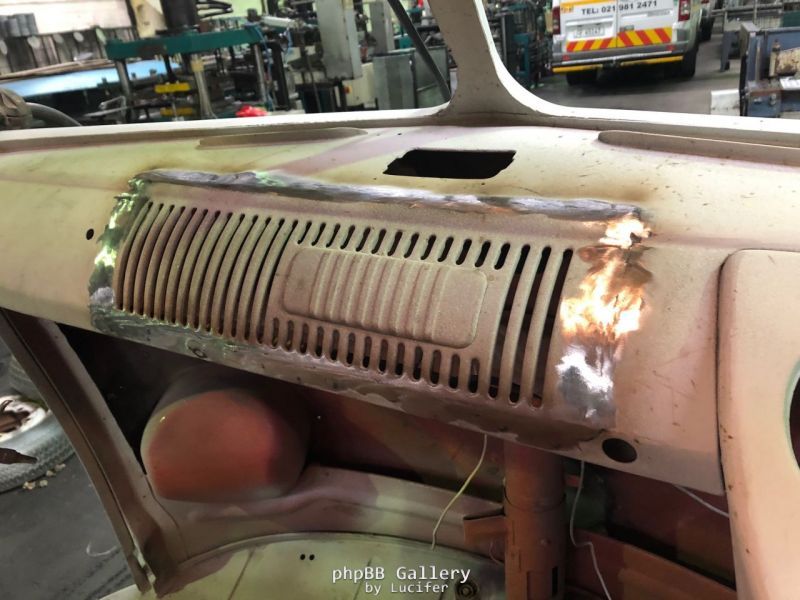
In the process of closing more hack jobs
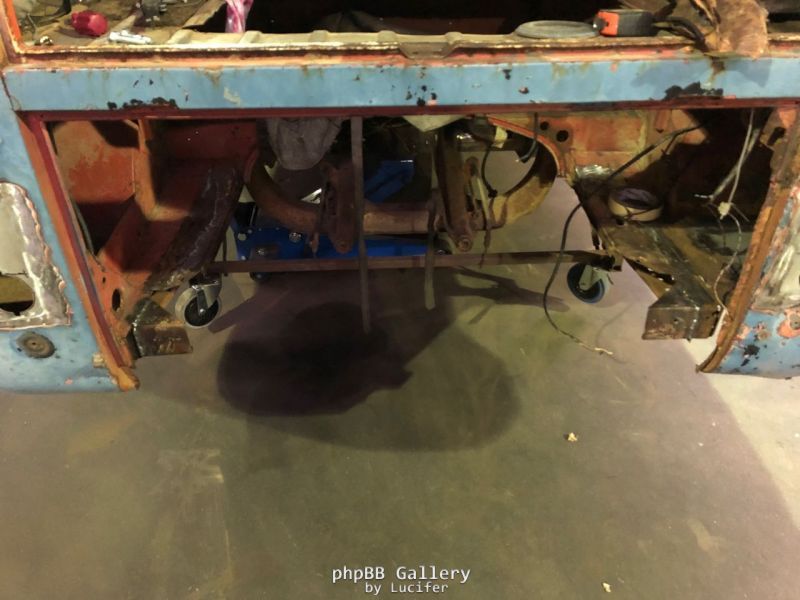
Then back to the underside
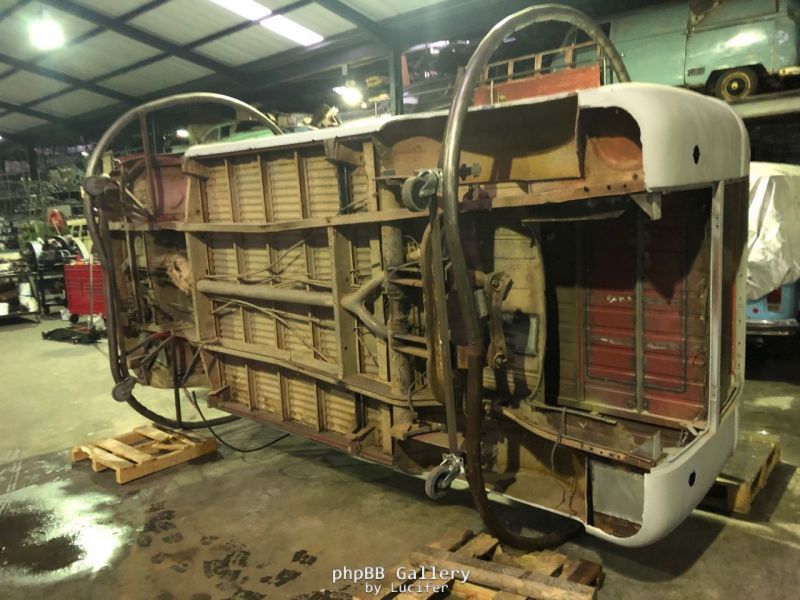
Outrigger replaced. Only the 2 middle ones needing replacing. Everything else underneath is still in very good shape.
Then it was off to the dreadful sandblasters. This was only to blast inside the window channels, gutters, seams etc.
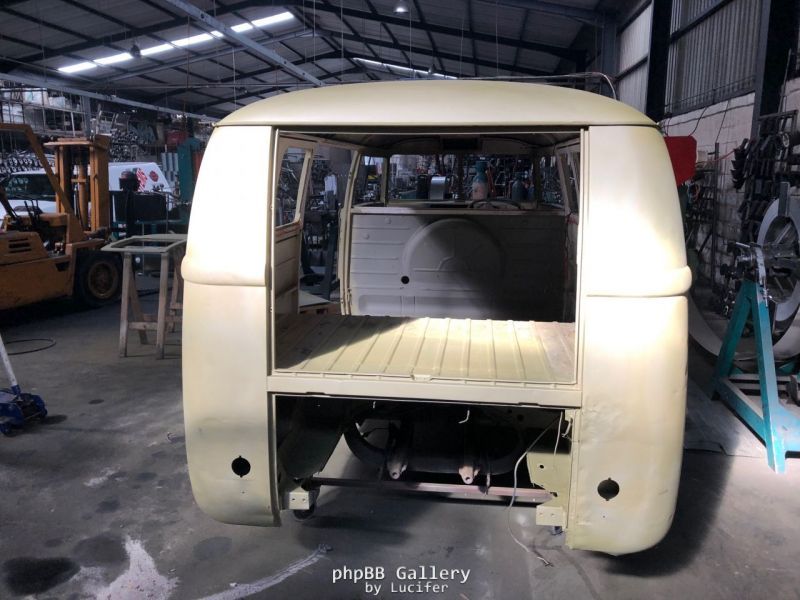
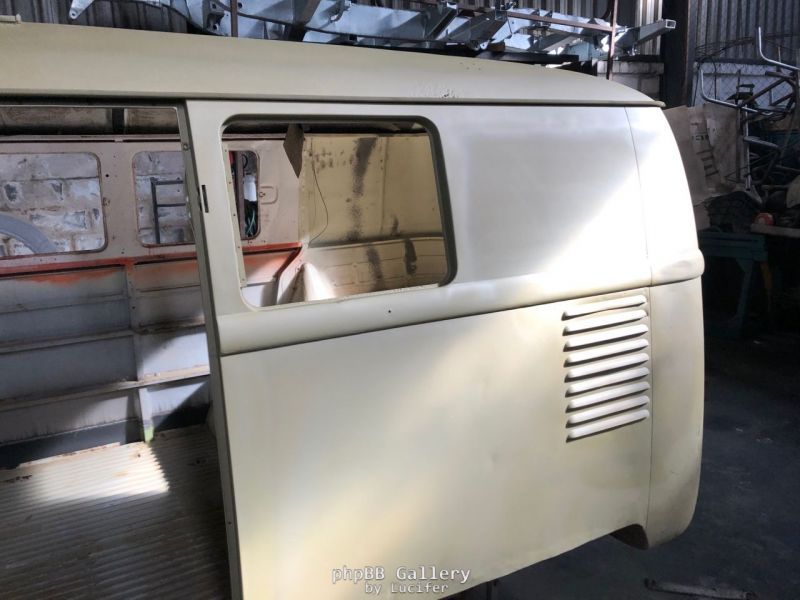
After the paint stripping and sandblasting, I coated with the epoxy primer.
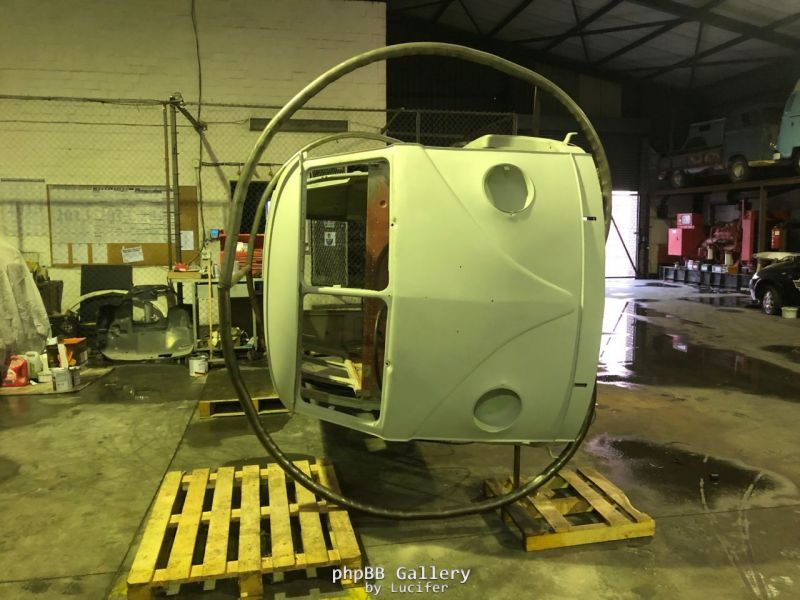
Re: My 1960 SO23 Westfalia
Posted: Mon Jul 06, 2020 9:33 pm
by sean
Now I have cheated a little on the final body work preparation. I decided to employ a panel beater that came looking for work as the company he worked for prior has closed down due to Covid 19 lockdown. I gave him a 1 day trial and he seemed to work pretty thorough. So he has now been working full swing on the body.
First coat of HS primer applied.
And now it can lay on its side for chassis preparation.
Re: My 1960 SO23 Westfalia
Posted: Mon Jul 06, 2020 10:25 pm
by Blitzkrieg
Some epic work there. Going back to original colours?