Page 10 of 15

Re: Retrovans 75 Fleetline panelvan - Project

Posted: Wed May 02, 2018 7:05 am
by Bugger
0c693950-0ebb-4c58-8302-c2febb571039.jpg
e20e8b39-8859-49c5-9d6f-a3574a3be4e9.jpg
2f8eb8a9-ec76-40a1-b399-33105b54052e.jpg
df277be7-3c51-48e5-a0fd-517532976781.jpg
IMG_1626.JPG

Sent from my iPhone using Tapatalk

Re: Retrovans 75 Fleetline panelvan - Project

Posted: Thu May 03, 2018 11:53 am
by retrovan
Well as can be seen, the Fleetline ran well all the way to Sani and back.

Fitting tribute to a nice Project.

Still need to do more to her, as with all aircooled projects, they are never complete.

This next time

Herman
Image

Image

Image

Image

Re: Retrovans 75 Fleetline panelvan - Project

Posted: Thu May 03, 2018 2:10 pm
by Terry Phillips
Well done Herman it just goes to show what you put into a old car you get out again.I am chuffed that you achieved what you set out to do.Good on you. :bowdown:

Re: Retrovans 75 Fleetline panelvan - Project

Posted: Sat May 05, 2018 3:46 pm
by retrovan
Thanks Terry,

Today I removed the Accuspark from the faulty Dizzy, and rebuild it to an OEM Bosch dizzy, with points and condenser.

Set the dwell time, and the timing by Strobe light.

Will be taking it for a ride, to do the final settings later today.

Will be keeping my import dizzy in spare box when using any of my aircooleds. :D

Herman

Re: Retrovans 75 Fleetline panelvan - Project

Posted: Sun Jun 17, 2018 11:16 am
by retrovan
OK so its been a long time since I updated the Project side of this thread.

And as I was keeping the progress quit before the Sani trip, as I wanted to get the reaction from the "Old School Boys"before letting the cat out the bag.

As you all know my feeling about driving a stock split bus, and having finally had Sean confirm this as being fact, even though he said he would deny saying this .. :roll: but yes, it is most unpleasant driving a split for more then ten kilos.

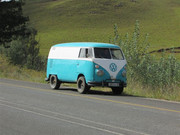
So as I did want a split, because I like the design, and always wanted one as a kid, got this badly scrap body and worked it to my desired daily driver.

To bring you all up to speed, if not wanting to read the whole tread, these are the personal changes made to the bus.

Must say at this point...... I have retained all the original parts, and panels removed, or cut out, or changed, so the next generation can put the bus back to original in the future.

We cut out all the rust and redid the body back to original.

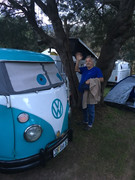
The Back has a Rock & Roll bed fitted
The front had the seat brace wall removed(and stored) and a "Flip-over-seat " fitted (so the seat can face forward or back when parked) ,
The front seat base is hinged so the spare wheel is housed under the seat, with the jack and all spare parts.
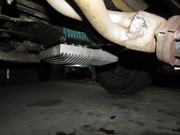
The front beam was removed (and stored), and replaced with an late bay beam, with the big disk brakes. (cut the beam, not the bus, so can change back)
Fitted brake booster with vacuum line from the motor.
Removed the split steering box and rebuilt it completely, and returned it back into the bus.
Fitted new drag arm, and all other linkages.
Replaced the ball joints, but drilled each with 6mm taped hole and fitted grease nipples.(this will prevent the ball joints from wear.)
Had adapter plates made to refit the wide 5 rims back onto the front wheels.
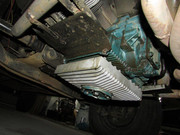
Fitted a 1914 cc Twin port type 1 engine with twin 34 ICT weber carb's.
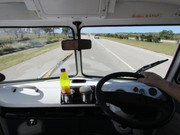
Oh and yes, I fitted a raised bush on the steering column, and fitted a small Golf steering wheel, so my driving posture is not so bent over.

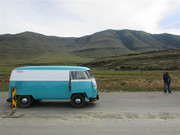
Now I hear you all ask.... as One Choir ..." and how does it drive now"..

Well it s magic, drove 3000km with ease, no back pain, no discomfort, just pure bliss.

Drives better then the Bay, nice seat space, and power with the reduction boxes mixed with the 1914cc motor gives all the grunt needed.

As I did not tell you, the engine has a balanced welded crank, so can run at 120 km should I want to.

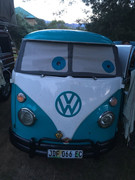
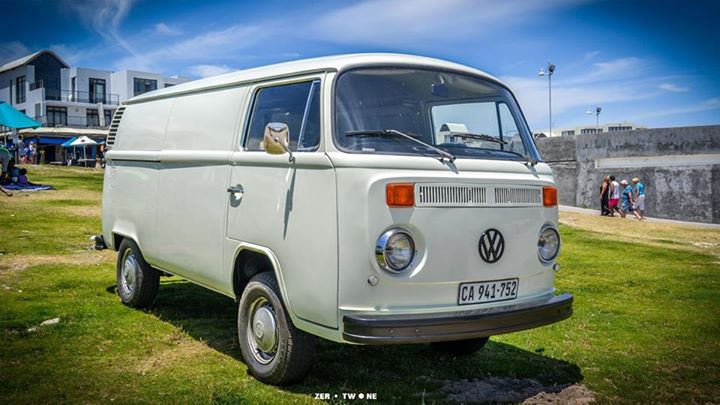
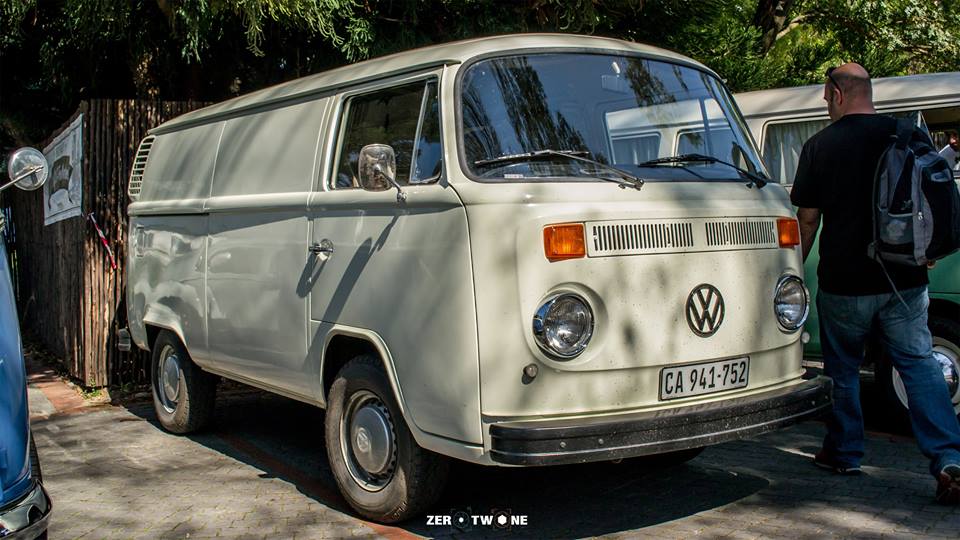
The last thing was the 3 beetle bumper I adapted to fit the front of the bus.

This needed to fit the look of the raised bus, as the original bumper would not do it justice.

Yes I did not have one to start with, but as the Fleetline bumper, miraculously changed from Fleetline to Beetle during transport from a VW enthusiast

and I had two beat-up beetle bumpers already, I did a bit of cutting, a bit of welding and a bit of fitting, and it came out looking very butch, fits the bus to a "T"

In true Herman style ..Image

Image

Well as i drive it more, and enjoy it more every time, I am happy with the final result.

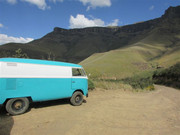
Am just looking into drop spindals, and will see what it looks like with them fitted, maybe, maybe not will see.

So now you up to date, and we will post any other changes should these be made.

Thanks for looking

Herman

Re: Retrovans 75 Fleetline panelvan - Project

Posted: Sun Jun 17, 2018 2:02 pm
by Tony Z
nice. How about some side views?

Dropped spindles will lower the front around 65mm.
On the bay bus, if you use bigger tyres than normal (i.e. 195R14C) they will bump into the wheel well when you have a passenger and go through a big dip. If you have 185R14C, it should give that little extra and not hit the well.

Re: Retrovans 75 Fleetline panelvan - Project

Posted: Sun Jun 17, 2018 2:35 pm
by retrovan
Have about 110mm from outer body arch to top of tyre now,

so will be making drop spindels at approx 45 mm as you say the 65 mm will be too much and give it a nose down look,

which is what I definitely do not want.

Have 195/70 15 at this moment and will keep them.

Will cast and machine my own spindels to suit the bus, and not import them.

Image

Image

Image

Herman

Re: Retrovans 75 Fleetline panelvan - Project

Posted: Sun Jun 17, 2018 3:14 pm
by Tony Z
I have to admit, I dont like the way those tyres look on your bus.

Coming back to the 65mm front drop. It does give a very slight nose down stance but unless you look for it on level ground, you cant see it.
But you can see the difference in the front. You can see on mine, how it went from stock height to the 65mm lowered. I think the lowered height makes it look much better, the way VW should have made it look. IMO

stock
Image

65mm dropped spindles
Image

Re: Retrovans 75 Fleetline panelvan - Project

Posted: Sun Jun 17, 2018 4:45 pm
by retrovan
If you measure the body to ground, there is only 20 mm difference between front and back, so 65 would be too much, as I do not want the lowered look, sorry, no offense intended. :shock:

the tyres have a 360 deg turn away from stock look, and with the black wheels and hubcaps just the right look for me. :D

All I now need is to have the company name air brushed in "old look" style, and she should look the ticket.

Well to my liking anyway... :wink:

Herman

Re: Retrovans 75 Fleetline panelvan - Project

Posted: Tue Jun 19, 2018 10:41 am
by lowlight
looking nice, from a purist

Re: Retrovans 75 Fleetline panelvan - Project

Posted: Tue Jun 19, 2018 10:58 am
by retrovan
lowlight wrote: Tue Jun 19, 2018 10:41 am looking nice, from a purist
Thank you, thats nice to hear.... :D

Means a lot

Herman

Re: Retrovans 75 Fleetline panelvan - Project

Posted: Thu Jun 21, 2018 10:22 am
by Dawie
Looking good, and it even did Sani pass.

"""but yes, it is most unpleasant driving a split for more then ten kilos."""
Comfort is a relative thing. Back in the day, our family did many 1600km-long trips from Vryheid,(Northern Natal), to the Cape and back in our 64/65 1500 split kombi. If the alternative is 7 people inside a DKW Junior, (our other car at the time), then a split kombi is...really comfortable. Trips were done starting during the very early hours of the morning, sometimes driving straight through to the Cape, others sleeping over halfway. Full throttle all the way, 60-65mph level road, sometimes below 40 uphill, sometimes seeing 80mph downhill. That was what earned my respect for aircooled vw engines.
I taught myself to drive with that kombi when i was 11 years old.

But indeed a baywindow is much more comfortable to drive, especially a late bay with type 4 engine.

Re: Retrovans 75 Fleetline panelvan - Project

Posted: Tue Aug 21, 2018 11:00 am
by retrovan
Just an update of whats been done to the Fleetline, Must find a name for her... :huh:

You may have seen that the radio hole has been temporary changed to cup holders, and the missing ash tray to cell phone holder.

The side cargo doors that near killed the biker on the Sani, have had the lock rods extended and now do not open by them self. :lol:

The Fuel gauge that has made me run out of fuel 3 times, has been sorted with replacement gauge parts as well as a new after market universal fuel sender, for the tank.

Setting this up has been a mission, until I worked out it was getting stuck on the internal divides and side wall of tank.

This was after filling and emptying the tank a number of times as well as near flooding the garage floor. :oops:

Fitted an extension sump, to bring the oil up to 4 lt. which helps with lubrication shelve life and cooling without the need of an oil cooler.

Fixed the rattle in the passenger door.

Finally fitted my imported Huco Low pressure electric fuel pump, so will see what the consumption say's.

Now all I need to do is repair the body damage on both sides, made by the loose battery's, bouncing up and down the Sani, as well as my bad reversing on its maiden trip.

Well till next time, thanks for looking

Herman
Image

Image

Image

Image

Re: Retrovans 75 Fleetline panelvan - Project

Posted: Sat Nov 03, 2018 11:38 am
by retrovan
So I toke the Fleetline out for a work trip seeing as the Baywindow is in the paint shop, for part 1 of her makeover.

Will do a full trip report in the correct thread on the trip itself. .. viewtopic.php?f=75&t=38253

Off I went from Jefferys Bay to PE to pick up steel to do a gate in Bathurst.

She ran like a dream all the way and all the way back to PE.

Here I loaded some more steel and headed back to Jefferys.

Filled up on Circular Drive and coasted down the hill to the robot.

when the robot changed I headed up the hill where she started spluttering, bad, held my foot flat on the accelerator pedal, and she slowly picked up rev's till she suddenly ran right.

Went 10 meters and the same thing, but this time she died after spluttering for a minute or two.

Would not start, toke of the fuel pipe and the fuel pumped out, and smelt OK.

Wound no spark.

Cleaned the points, and still nothing. Opened and closed points with screwdriver and had spark, set point again and tried her, still nothing.

Went back to do the points again, made sure I had spark and tried again.

This time she took, but ran like :bn:

But got in and drove her out of town onto the highway where I stopped and try to get her to run right.

Set the timing forward and back but no change.

As it was getting dark, I decided to try my luck and head home.

She ran on what was two cylinders, then three the the 4th one gave a bit of power, and so I drove on.

On the hill she slowed right down, and started to ping, so I reset the timing, and the 1 hour drive took 2 hours but I got home.

So have not looked what the problem is of yet, as I have other priority's that must come 1st.

What is the problem I hear you ask, well I do not know, but here are a few idear's

Bad petrol
capacitor
wet plugs from water in fuel
dead plugs
Points leaking to earth
creaked cap

Will have to wait and see.

What your thought ??

Herman

Re: Retrovans 75 Fleetline panelvan - Project

Posted: Sat Nov 03, 2018 12:32 pm
by Tony Z
I'd pull the plugs first. If they are really and black, my guess is leaky needles/seats leading to fouled plugs