My Baja Bug Rebuild

Give details and pictures of your ACVW projects here.
User avatar
Edmond
Valve
Posts: 1122
Joined: Sun Jun 15, 2008 7:57 pm
What model do you have?: 1973 Baja Bug
Location: Burgundy Estate, Cape Town
Has thanked: 22 times
Been thanked: 32 times

Re: My Baja Bug Rebuild

Post by Edmond »

retrovan wrote: Mon Mar 22, 2021 8:38 pm Nice work so far,

Always good to get yet another thing done.

Soon you will be driving with joy.

Keep posting, love to follow your thread.

Herman
Thanks Herman

Likewise I love following your Mefusco thread as it is really something different and interesting


User avatar
Edmond
Valve
Posts: 1122
Joined: Sun Jun 15, 2008 7:57 pm
What model do you have?: 1973 Baja Bug
Location: Burgundy Estate, Cape Town
Has thanked: 22 times
Been thanked: 32 times

Re: My Baja Bug Rebuild

Post by Edmond »

Made some more progress, more rust cutout, templates created, now just need to get some 1.2mm plate for the repair sections

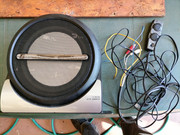
The sound is almost sorted, I picked up a 8 inch pioneer active sub with remote for R300, just need a set of component splits(mids and tweeters with crossovers) but these can wait a bit
Image

Image

Image
User avatar
Edmond
Valve
Posts: 1122
Joined: Sun Jun 15, 2008 7:57 pm
What model do you have?: 1973 Baja Bug
Location: Burgundy Estate, Cape Town
Has thanked: 22 times
Been thanked: 32 times

Re: My Baja Bug Rebuild

Post by Edmond »

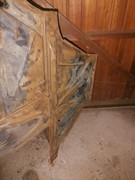
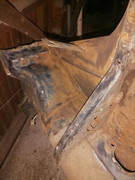
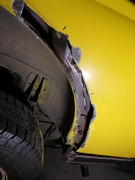
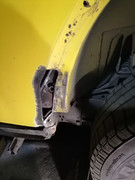
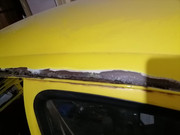
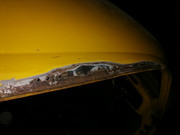
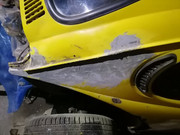
I haven't posted in a while so thought it's time to update this thread. I have started cutting out some rust by the back windscreen, also welded in a patch panel on the left back fender well. I also removed the previous fiberglass repairs on the roof that were starting to lift, uncovered some nice holes and major rust.
I need some advice on how to fix the roof/roof gutter area and how best to kill the rust so it does not return.
Image

Image

Image
User avatar
retrovan
Donor
Donor
Posts: 8710
Joined: Mon Feb 07, 2011 8:51 pm
What model do you have?: 52T1,68FB,72Bay,75FL
Location: Eich! no, in Jefferys Bay
Has thanked: 421 times
Been thanked: 541 times
Contact:
Netherlands

Re: My Baja Bug Rebuild

Post by retrovan »

Problem with the roof gutter is its two parts welded on top of each other

So once the rust has got in between its hard to stop it without cutting the joint open and re build the roof completely.

But what you can do is expose both sides and wire brush as much as you can even into the joint, then brush in a rust converter, keep wetting the joint with rust converter so it can soak in between the two layers of steel.

Now try to seal the joint once dry with a thick coat of clear coat, this will stop air going in and starting the rust again.

Rust cannot rust unless it gets water or air. it you stop both she will not get worse

Good luck and nice work.

Herman
1952 Split Beetle 1835cc
1968 Fastback 2Lt.type4
1972 Low Light Bay Panel Van 2Lt type 4
1975 Fleetline Panel Van 1914cc
2020 MeFusco Beetle Truck 2Lt type 4
1972 FT Hahn SP 1776 cc
User avatar
Edmond
Valve
Posts: 1122
Joined: Sun Jun 15, 2008 7:57 pm
What model do you have?: 1973 Baja Bug
Location: Burgundy Estate, Cape Town
Has thanked: 22 times
Been thanked: 32 times

Re: My Baja Bug Rebuild

Post by Edmond »

Thanks Herman

That's what I was worried about, the rust has crept between the two layers. Will try your suggestion with wire brush and rust converter.
Do you think fiberglass is the best to use for this repair, it lasted 20 yrs on the previous repair or should I rather use aluminum mesh and fiberglass filler, I don't really want to cut out that part of the roof and weld in a donor piece but if it's the only way so be it.
User avatar
retrovan
Donor
Donor
Posts: 8710
Joined: Mon Feb 07, 2011 8:51 pm
What model do you have?: 52T1,68FB,72Bay,75FL
Location: Eich! no, in Jefferys Bay
Has thanked: 421 times
Been thanked: 541 times
Contact:
Netherlands

Re: My Baja Bug Rebuild

Post by retrovan »

Fiberglass is very old school, as they did not know that fiberglass was hydroscopic.

It will draw water into it and rust the metal contact surface faster then when left open.

Your best bet it to tape up the underside after applying your rust converter

pour in a water proof epoxy resine compound, the same I use for sealing tanks.see below.

And when dry paint on the underside in layers. Maybe apply a clear coat just to seal the edge of the resine, as its in your headliner, I would not sand or polish it for max strength

You can then sand it smooth an cover with your paint and it will last indefinite.

Hope this helps.

Herman

Image
1952 Split Beetle 1835cc
1968 Fastback 2Lt.type4
1972 Low Light Bay Panel Van 2Lt type 4
1975 Fleetline Panel Van 1914cc
2020 MeFusco Beetle Truck 2Lt type 4
1972 FT Hahn SP 1776 cc
User avatar
Edmond
Valve
Posts: 1122
Joined: Sun Jun 15, 2008 7:57 pm
What model do you have?: 1973 Baja Bug
Location: Burgundy Estate, Cape Town
Has thanked: 22 times
Been thanked: 32 times

Re: My Baja Bug Rebuild

Post by Edmond »

It's been ages since I posted an update but to be honest not much progress has taken place, just haven't had time this year but luckily the license has been kept up to date.
I did manage to buy another chassis today that has a solid passenger floor and a solid front cross member that I can transplant onto my chassis.
I plan to get stuck big time in this project next year and finish it.
We recently installed a full size spray booth at work and have been offered the chance to use it when the time is right to spray the Baja.
User avatar
Edmond
Valve
Posts: 1122
Joined: Sun Jun 15, 2008 7:57 pm
What model do you have?: 1973 Baja Bug
Location: Burgundy Estate, Cape Town
Has thanked: 22 times
Been thanked: 32 times

Re: My Baja Bug Rebuild

Post by Edmond »

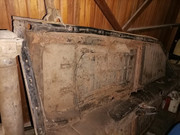
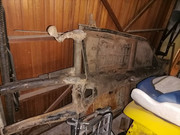
The chassis got delivered this morning, it's in good mick bar the drivers side floor, I think if it had papers I might have swapped everything over onto it. The tunnel is solid as well. The guy that sold it to has no papers plus the pan has no number on the usual place by the gear link inspection cover.
Image

Image
User avatar
Edmond
Valve
Posts: 1122
Joined: Sun Jun 15, 2008 7:57 pm
What model do you have?: 1973 Baja Bug
Location: Burgundy Estate, Cape Town
Has thanked: 22 times
Been thanked: 32 times

Re: My Baja Bug Rebuild

Post by Edmond »

I managed to score a std uncut (both mains and big ends std 55mm size) beetle crank and con rods recently to add to my parts hoard. This will be kept for future use and once the Baja is finished I will see if I can get this crank counterweighted and 8 dowelled.
User avatar
Edmond
Valve
Posts: 1122
Joined: Sun Jun 15, 2008 7:57 pm
What model do you have?: 1973 Baja Bug
Location: Burgundy Estate, Cape Town
Has thanked: 22 times
Been thanked: 32 times

Re: My Baja Bug Rebuild

Post by Edmond »

Finally got to do some work on my Baja this past weekend. I started drilling out the many spot welds holding on the donor chassis floor psns, was really tiring work especially in the Cape Town heat.
I also ordered more body work supplies, namely epoxy primer, hardener, thinners, seam sealer and some body work tools.
I am going to be finishing the body trolley so I can work on the chassis properly, I have a few rust repairs to do on the chassis still namely by the front crossmember area.
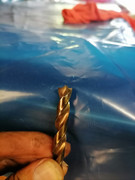
Hers a pic of the home made spot weld drill out of a hss cobalt drill bit.
Image
Haans
Camshaft
Posts: 895
Joined: Wed Apr 20, 2016 7:10 pm
What model do you have?: 1960 ghia
Location: Nelson Mandela Metro
Has thanked: 1 time
Been thanked: 107 times
South Africa

Re: My Baja Bug Rebuild

Post by Haans »

Hi, brave . Very brave. You are now going down a path not many has gone down... good luck !!!!
Haans
User avatar
Edmond
Valve
Posts: 1122
Joined: Sun Jun 15, 2008 7:57 pm
What model do you have?: 1973 Baja Bug
Location: Burgundy Estate, Cape Town
Has thanked: 22 times
Been thanked: 32 times

Re: My Baja Bug Rebuild

Post by Edmond »

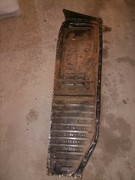
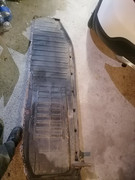
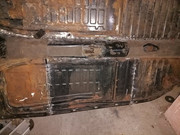
I managed to get the donor passenger side floorpan loose from the donor chassis. It was hard work drilling out more spot welds and cutting through other welded areas but at least it's done.. Next is to clean up the donor floor and repair the two holes someone used to mount seat belts with, not the safest idea. The donor floor looks in good condition, still super solid with just some surface rust on it. It looks like an original floor, still has all that tar black substance on used to seal the welded areas.
Image

Image
User avatar
AlanH
Crankshaft
Posts: 745
Joined: Thu Jan 17, 2013 7:20 am
What model do you have?: '70 Westy
Location: Pretoria
Has thanked: 119 times
Been thanked: 86 times
Germany

Re: My Baja Bug Rebuild

Post by AlanH »

Keep at it. Every day a little goes a long way.
Wanted parts:
Left sunvisor
Sink faucet
Exhaust to swap for Beetle exhaust
User avatar
Edmond
Valve
Posts: 1122
Joined: Sun Jun 15, 2008 7:57 pm
What model do you have?: 1973 Baja Bug
Location: Burgundy Estate, Cape Town
Has thanked: 22 times
Been thanked: 32 times

Re: My Baja Bug Rebuild

Post by Edmond »

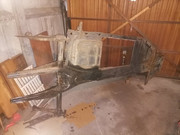
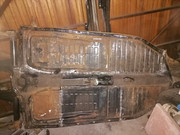
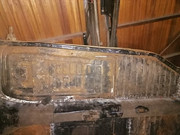
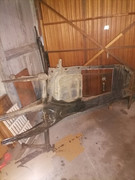
So after a more thorough inspection of the original chassis on my Baja it's way worse than I thought. It has serious rust in the frame head bottom plate area, I can see pinholes from the bottom and inside must be super rusty and super rust in the napoleon hat area, it must have had a brake fluid leak or water hot trapped in that area.
I have decided it's not worth fixing the original chassis and will transfer everything over to the chassis I bought earlier this year which is in brilliant condition with just light surface rust and some rust on the drivers side floor.
I have started cleaning up the spare chassis and have cut the rust out the drivers side floor and have a replacement section waiting to be welded in.
It's a shame I removed the passenger side pan earlier from the spare chassis as now I have to weld it back in.
I'm going to finish cleaning up all the surface rust on the spare chassis, weld the passenger floor back and weld the drivers floor piece in and then paint it with Duram DTM paint along with seam sealing the joints.
As soon as the replacement chassis is ready I'm stripping the old chassis down, removing the engine, gearbox and suspension.
I have a complete new brake system ready for the replacement chassis( new master cylinder, new Ate wheel cylinders and new rubber brake hoses)
Image

Image

Image

Image
Post Reply