Milly the 1979 Westfalia Berlin Deluxe Bay Window Camper Van

Give details and pictures of your ACVW projects here.
chrisradioman
Carburettor
Posts: 1790
Joined: Sat Mar 23, 2013 3:16 am
What model do you have?: Bay Window Westfalia
Facebook: http://www.facebook.com/chrisradioman
Location: Swansea UK
Been thanked: 11 times

Re: Milly the 1979 Westfalia Berlin Deluxe Bay Window Camper

Post by chrisradioman »

Hope you all had a great Christmas, I did, spent it with all my family over my mothers, really relaxed day & lots of fun.
I had a good results with the present front to, here are my VW gifts:-
Image
Image
Image
Image
Image
Image
Image
Image
Image
Image
chrisradioman
Carburettor
Posts: 1790
Joined: Sat Mar 23, 2013 3:16 am
What model do you have?: Bay Window Westfalia
Facebook: http://www.facebook.com/chrisradioman
Location: Swansea UK
Been thanked: 11 times

Re: Milly the 1979 Westfalia Berlin Deluxe Bay Window Camper

Post by chrisradioman »

Went to fit my No. plate but there are only two holes in the engine lid, different to Chug Chug so I need to find a different way to fit the plate:-
Image
Image
chrisradioman
Carburettor
Posts: 1790
Joined: Sat Mar 23, 2013 3:16 am
What model do you have?: Bay Window Westfalia
Facebook: http://www.facebook.com/chrisradioman
Location: Swansea UK
Been thanked: 11 times

Re: Milly the 1979 Westfalia Berlin Deluxe Bay Window Camper

Post by chrisradioman »

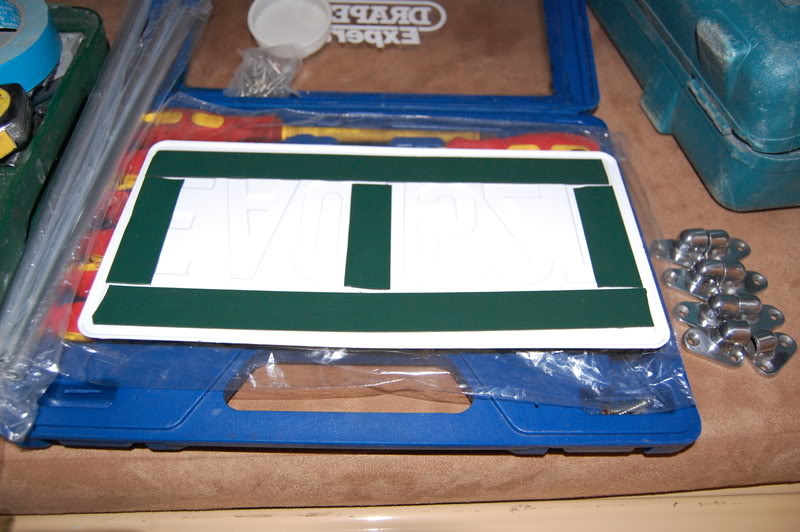
Decided this morning to fit my rear Jail bars, now the standard instructions arn't very good so I decided to do my own:-
Image
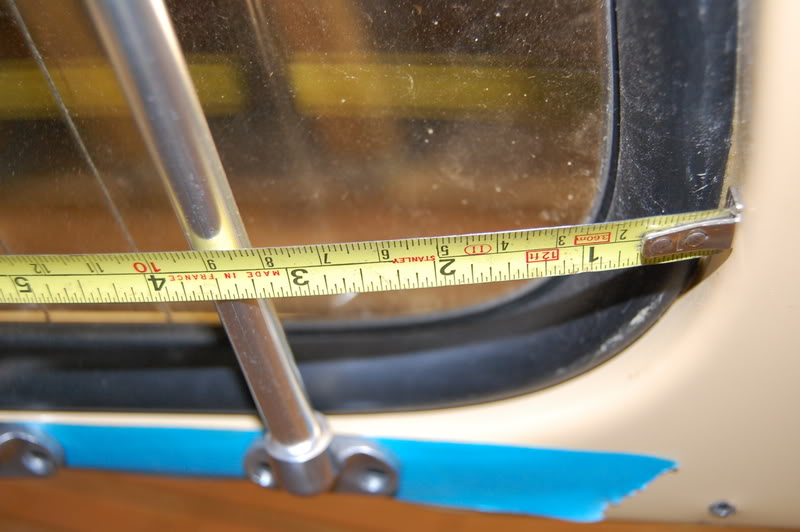
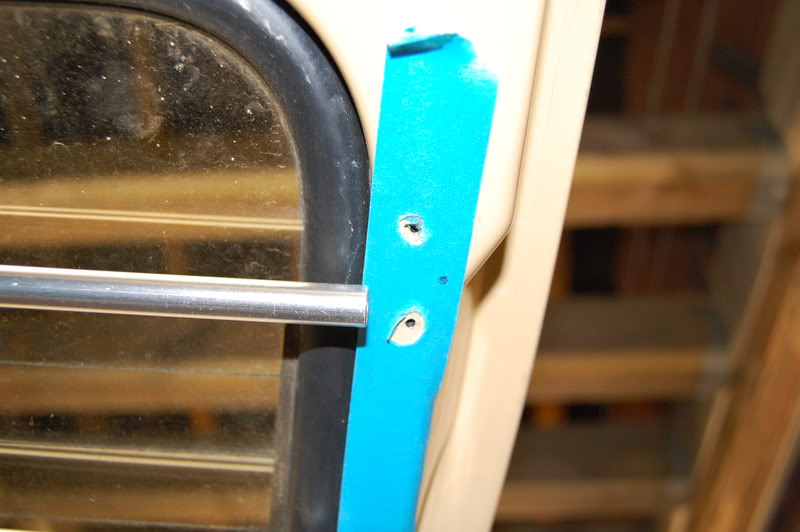
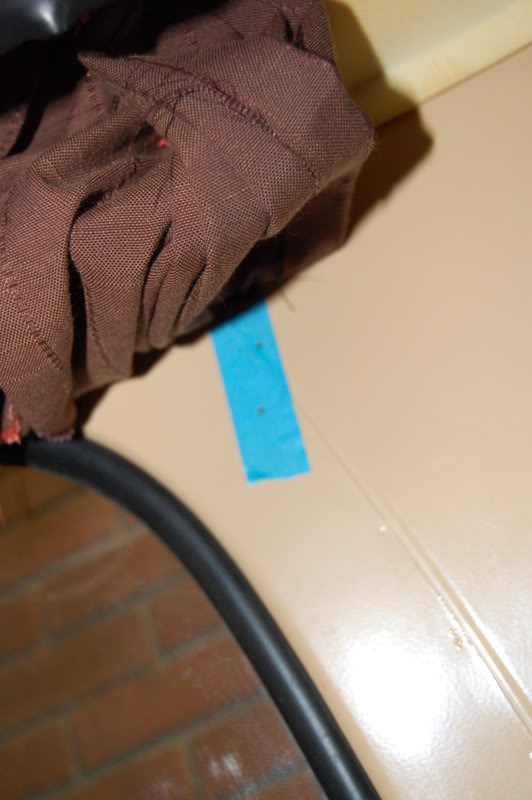
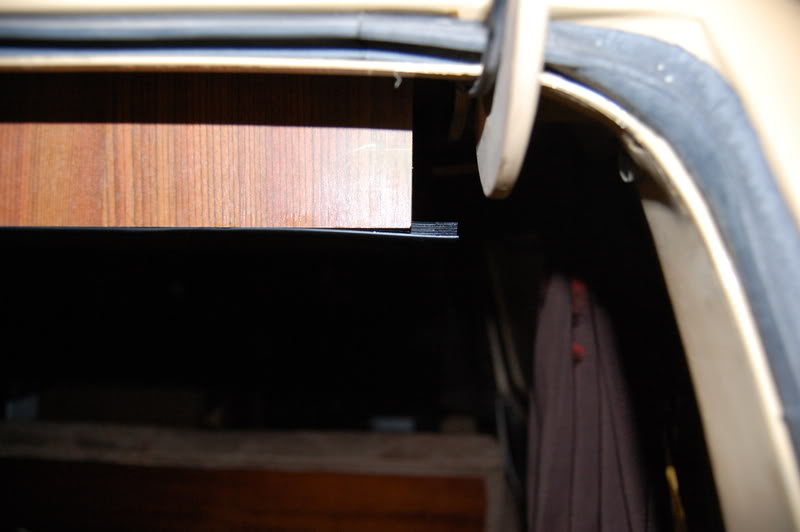
First jpb is to open the rear hatch & move the curtains & rail out of the way (If you have them). Put a piece of masking tape on the metal under the window rubber around the middle of the panel.
Image
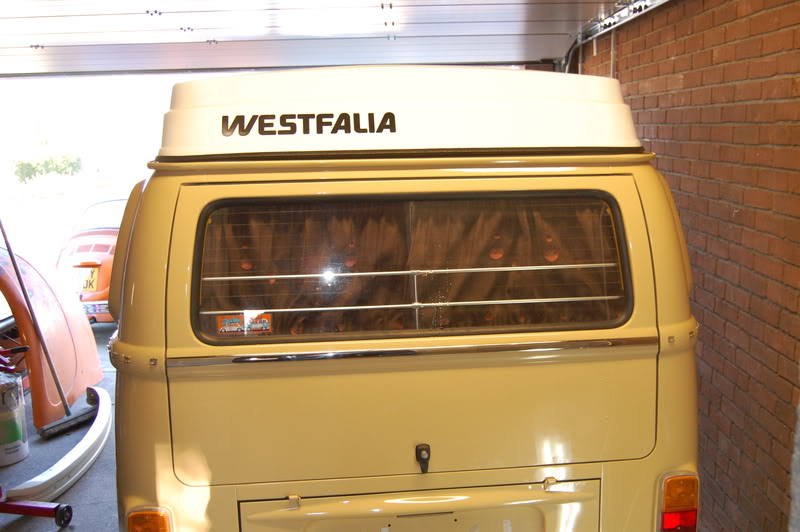
Measure from edge to edge of the hatch & mark the centre. Now measure from one side to the centre & then the other. Your mark should be an equal distace from the end.
Image
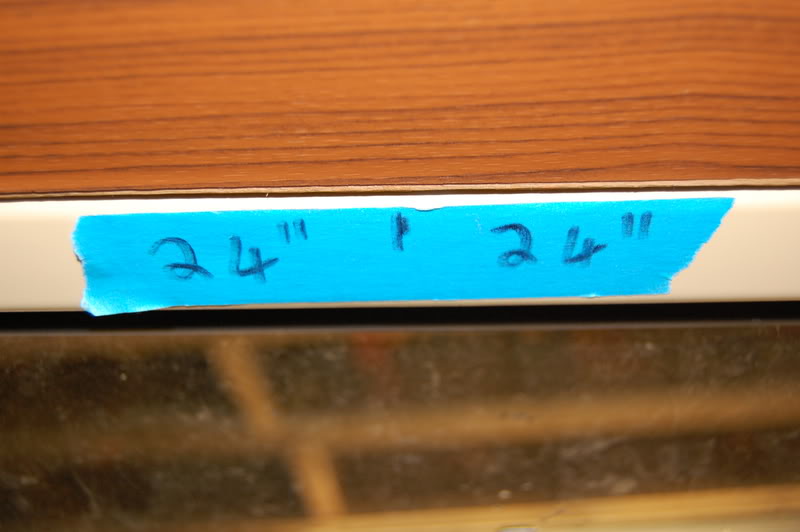
I made it exactly 24" You can use metric or inches but I've chosen inches because it was exactly 48" from edge to edge.
Image

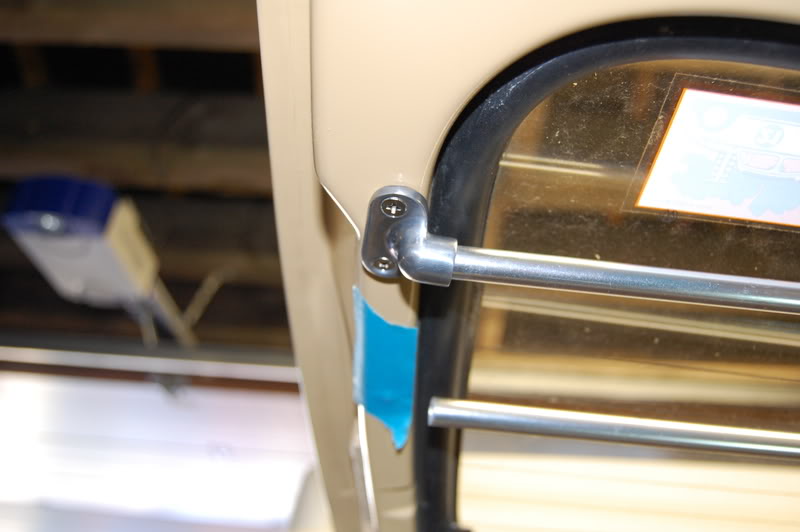
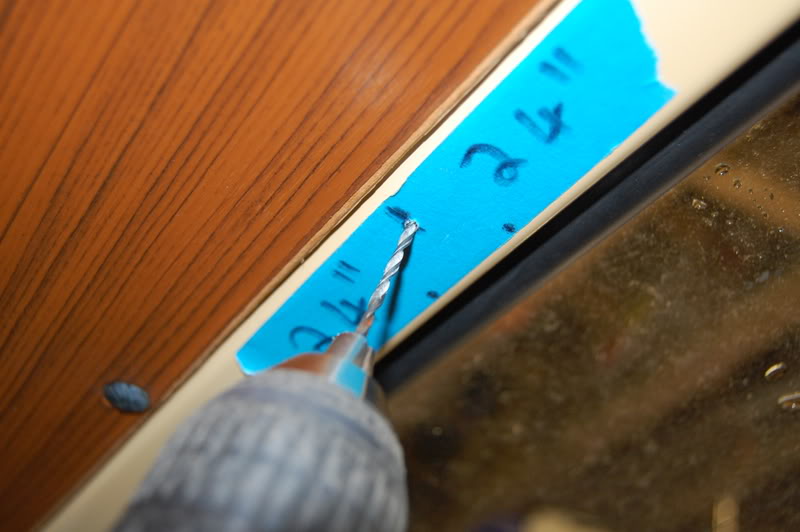
When your happy place the centre bar in possition & mark out its hole positions, now drill out the holes with a 2.5mm drill bit.
Image
Now you can remove the masking tape.
Image
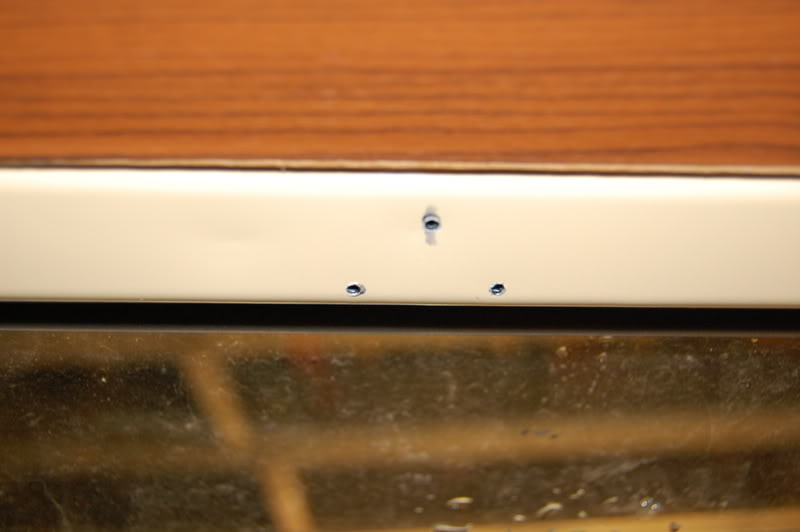
Make sure to protect the area from rust developing by coating with wax (Waxoyl or similar)
Image
You can now screw your centre bracket in place, make sure you use a good fitting screw driver to avoid damageing the screws, in my case this was a No.2 Philips driver.
Image
chrisradioman
Carburettor
Posts: 1790
Joined: Sat Mar 23, 2013 3:16 am
What model do you have?: Bay Window Westfalia
Facebook: http://www.facebook.com/chrisradioman
Location: Swansea UK
Been thanked: 11 times

Re: Milly the 1979 Westfalia Berlin Deluxe Bay Window Camper

Post by chrisradioman »

You will notice that the two bars are slightly different lengths.
Image

The short one goes at the top of the glass (with the tail gate closed) so fit these now.
Image

Measure from the bottom edge of the glass aperture to the centre of the jail bar, you will note that it is exactly 3"
Image

This distance must be the same at either end. again put making tape on the bit your marking, if its out adjust acordingly.
Image

Once you've marked the holes & drilled you can remove the masking take before wax protecting & fixing in possition.
Image

If you don't use masking take & the drill goes in to far you'll damage the paint work, luckily for me I only damaged the tape.
Image

Once the bottom bar is done do the same to the top bar again there is a 3" gap between the top & bottom bars. Once finished the bars should be parallel & level all the way from one end to the other, you can then admire your handy work:-
Image
chrisradioman
Carburettor
Posts: 1790
Joined: Sat Mar 23, 2013 3:16 am
What model do you have?: Bay Window Westfalia
Facebook: http://www.facebook.com/chrisradioman
Location: Swansea UK
Been thanked: 11 times

Re: Milly the 1979 Westfalia Berlin Deluxe Bay Window Camper

Post by chrisradioman »

With the side Jail Bars no instructionsat all were given so its a case of working it all out.
I remember with Chug Chug I tried to keep the same height as the rear but to me they always looked a bit shallow, so I decided to disregard the rear ones & fit them at the angle I would like.
One obstacle in the way is the rear seatbelt, so I've brought the bars further back to compensate.
Image


Again mark with masking tape.
Image

Once I fitted the longest bar it was just a case of spaceing the shorter bar 3" away, marking & fixing it.

The hard part will be doing the other side for 2 reasons:-
1.) It needs to be symetrical.
2.) There is a cupboard in the way which may stop the fitment alltogether.
Image
Image
Image
chrisradioman
Carburettor
Posts: 1790
Joined: Sat Mar 23, 2013 3:16 am
What model do you have?: Bay Window Westfalia
Facebook: http://www.facebook.com/chrisradioman
Location: Swansea UK
Been thanked: 11 times

Re: Milly the 1979 Westfalia Berlin Deluxe Bay Window Camper

Post by chrisradioman »

Because the jailbar brackets have covered up the holes for the curtain tiebacks 've had to drill 2 new ones so thats done.
Image
Image

I decided as I'm off out in the bus tomorrow I want to fit my new No. plate.
First I got to get the old adhesive off.
Image

Useing this stuff which doesn't damage the paint.
Image

After a bit of elbow grease.
Image

Put some tape on the new plate.
Image

& stuck it on.
Image

I also fitted my new GB badge.
Image

Looks the part now, just got to sort out my rear bumper.
Image
chrisradioman
Carburettor
Posts: 1790
Joined: Sat Mar 23, 2013 3:16 am
What model do you have?: Bay Window Westfalia
Facebook: http://www.facebook.com/chrisradioman
Location: Swansea UK
Been thanked: 11 times

Re: Milly the 1979 Westfalia Berlin Deluxe Bay Window Camper

Post by chrisradioman »

All the cabinates of my Westy have a t-trim edgeing in black around the edges, the Californian sun has caused it to shrink & buckle. I discovered today that if you remove it, soak it in very hot water you can strech it. You can then tweak it useing the heat from a hair drier, You can heat up the kinks adjust them & then blow cold air over them the get them to stay in shape I've done this with 3 parts now & its worked well. Its a pain in the arse but I'm sure it will be worth it in the end.
Image

As you can see the trim is shrunk & very short.
Image
Image

After a bit of heating & streching its now too long, I'll leave it a while to see if it creeps back if not I'll trim it flush.
Image
Image

This is how the trim looks before any treatment.
Image
chrisradioman
Carburettor
Posts: 1790
Joined: Sat Mar 23, 2013 3:16 am
What model do you have?: Bay Window Westfalia
Facebook: http://www.facebook.com/chrisradioman
Location: Swansea UK
Been thanked: 11 times

Re: Milly the 1979 Westfalia Berlin Deluxe Bay Window Camper

Post by chrisradioman »

Took Milly out for a cruise today on about 120 mile trip the bus ran faultlessly even without my front bumper fitted, it was a bit dold tough so I got to get the heating sorted soon:-
Image
Image
Image
Image
Image
Image
Image
chrisradioman
Carburettor
Posts: 1790
Joined: Sat Mar 23, 2013 3:16 am
What model do you have?: Bay Window Westfalia
Facebook: http://www.facebook.com/chrisradioman
Location: Swansea UK
Been thanked: 11 times

Re: Milly the 1979 Westfalia Berlin Deluxe Bay Window Camper

Post by chrisradioman »

Just an unrelated update, my last bus Chug Chug is pictred in January VW Ultra in a write up on Volksfest Wales 2008 so get out & grab a copy now. Chug Chug is there on the Airdiction stand. :lol:
Image
A lot of the pics were taken by me. :grin:
chrisradioman
Carburettor
Posts: 1790
Joined: Sat Mar 23, 2013 3:16 am
What model do you have?: Bay Window Westfalia
Facebook: http://www.facebook.com/chrisradioman
Location: Swansea UK
Been thanked: 11 times

Re: Milly the 1979 Westfalia Berlin Deluxe Bay Window Camper

Post by chrisradioman »

Got a new picture thanks to Glyn G-surfer:-
Image
chrisradioman
Carburettor
Posts: 1790
Joined: Sat Mar 23, 2013 3:16 am
What model do you have?: Bay Window Westfalia
Facebook: http://www.facebook.com/chrisradioman
Location: Swansea UK
Been thanked: 11 times

Re: Milly the 1979 Westfalia Berlin Deluxe Bay Window Camper

Post by chrisradioman »

Milly has been neglected lately stuck in the garage unloved for a few months well seeing as I've been invited to enter her in the Volksworld show at the end of March I thought I'd better crack on & get the outstanding jobs done. The first one is to get her running so off she goes tomorrow to Deans yard to get her running again, here she is on Deans trailer all strapped down ready to go:-
Image
Image
Image
Image
Image
Image
Image
Image
chrisradioman
Carburettor
Posts: 1790
Joined: Sat Mar 23, 2013 3:16 am
What model do you have?: Bay Window Westfalia
Facebook: http://www.facebook.com/chrisradioman
Location: Swansea UK
Been thanked: 11 times

Re: Milly the 1979 Westfalia Berlin Deluxe Bay Window Camper

Post by chrisradioman »

Jobs to do before the show:-
1.) fit my front mesh sun visor
2.) fit the corner De-luxe trims
3.) fit the gas pipe to the hob & put the unit back together
4.) wire up my electric tap
5.) get milly running properly
6.) sort out why the alternator is pulling the battery down over night
7.) Plastic coat the bumpers & over riders & fit them back on
8.) finish the laminate inside
9.) fit my lower dash parcel shelf
10.) get new curtains made & fitted
11.) recover the front seats
12.) fit my reversing alarm
13.) clean & polish her inside & out
chrisradioman
Carburettor
Posts: 1790
Joined: Sat Mar 23, 2013 3:16 am
What model do you have?: Bay Window Westfalia
Facebook: http://www.facebook.com/chrisradioman
Location: Swansea UK
Been thanked: 11 times

Re: Milly the 1979 Westfalia Berlin Deluxe Bay Window Camper

Post by chrisradioman »

Thanks to Dean dp67bug Milly is now running spot on, he put her up on the ramps & straight away said its the fuel pum, cleaned the connections & now she's running spot on.

Jobs to do before the show:-
1.) fit my front mesh sun visor
2.) fit the corner De-luxe trims
3.) fit the gas pipe to the hob & put the unit back together
4.) wire up my electric tap

6.) sort out why the alternator is pulling the battery down over night
7.) Plastic coat the bumpers & over riders & fit them back on (removed ready)
8.) finish the laminate inside
9.) fit my lower dash parcel shelf
10.) get new curtains made & fitted
11.) recover the front seats
12.) fit my reversing alarm
13.) clean & polish her inside & out
chrisradioman
Carburettor
Posts: 1790
Joined: Sat Mar 23, 2013 3:16 am
What model do you have?: Bay Window Westfalia
Facebook: http://www.facebook.com/chrisradioman
Location: Swansea UK
Been thanked: 11 times

Re: Milly the 1979 Westfalia Berlin Deluxe Bay Window Camper

Post by chrisradioman »

Well I can knock one job of the list I've fitted my new genuine door seals & these fit much better than the ones fitted when I had it:-
Image
Image
chrisradioman
Carburettor
Posts: 1790
Joined: Sat Mar 23, 2013 3:16 am
What model do you have?: Bay Window Westfalia
Facebook: http://www.facebook.com/chrisradioman
Location: Swansea UK
Been thanked: 11 times

Re: Milly the 1979 Westfalia Berlin Deluxe Bay Window Camper

Post by chrisradioman »

Found a local guy to do my seats now ready for the Volksworld Show. :D
Post Reply