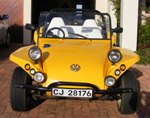
My Beamish Bug fixer-upper
-
Loopy

- Oil Cooler
- Posts: 318
- Joined: Fri Dec 25, 2009 8:15 pm
- What model do you have?: Beach Buggy
- Location: Brackenfell, Western Cape
- Has thanked: 11 times
- Been thanked: 6 times
Re: My Beamish Bug fixer-upper
How do I modify the 62 - 67 tail lights to fit on the buggy body? Is it just a question of cutting it till it fits? 
"What I would suggest is that you draw up a project plan and then prioritise the things you NEED to do linked to the budget you have." by Vader
Truer words have never been spoken...
Truer words have never been spoken...
-
Loopy
- Oil Cooler
- Posts: 318
- Joined: Fri Dec 25, 2009 8:15 pm
- What model do you have?: Beach Buggy
- Location: Brackenfell, Western Cape
- Has thanked: 11 times
- Been thanked: 6 times
Re: My Beamish Bug fixer-upper
So the holiday has come and gone, and it's back to work to earn money to fix the buggy...
Things were in a rush to get the buggy in such a state as to be usable for the holiday, which in hindsight led to problems and expenditure that could have been prevented. The fitting of the Empi 4-in-1 exhaust had the effect of the rear bumper cage not fitting anymore, so the pipes of the cage had to be cut and extended. The (new) exhaust had a hole that had to be welded.
Fitting coil-over shocks caused the rear suspension to be reset, while that was done it was found that the steering box was shot (replaced with second hand part), king and link pins had to be replaced, one tie-rod end was replaced, wheel alignment had to be set.
Everything was done in a bit of a rush, as the buggy was going to be towed behind my car, and utilised as packing space for some of the luggage.Towing was a breeze, very happy with that part!
Found that the fuel gauge is very accurate, as I ran out of fuel when it showed empty, luckily on the garage forecourt! Unfortunately this caused dirt to get into the carb, causing extreme rough running. We tried to fix that by cleaning the carb, but was only partially successfull, so we were stuck with a badly running buggy, and decided to park it. Luckily this was during the last few days of the holiday, so not too big a issue.
After returning home, I started phoning around to cost a replacement carb, as the old one had two stripped screws on the float bowl. after recovering from that (small) shock, I did what I should have done right after I bought the buggy, and took it to Grand Slam.
Juergen fixed the carb for a fraction of the price of a new one, and I asked him to give the buggy a thorough inspection to see if there is any more surprises lurking. Should be picking it up tomorrow, and then it can be driven for a while, as saving continues for the way forward.
"What I would suggest is that you draw up a project plan and then prioritise the things you NEED to do linked to the budget you have." by Vader
Truer words have never been spoken...
Truer words have never been spoken...
-
Loopy
- Oil Cooler
- Posts: 318
- Joined: Fri Dec 25, 2009 8:15 pm
- What model do you have?: Beach Buggy
- Location: Brackenfell, Western Cape
- Has thanked: 11 times
- Been thanked: 6 times
Re: My Beamish Bug fixer-upper
The Planned way forward:
In no particular order:
Full respray of the body, looking at Candy apple red.
Fitting a 4 point roll cage, finished in the same colour as the bumpers and side bars. (Satin Silver)
Fit a instrument cluster with full instrumentation.
Fit Citi Golf Indicator/Wiper switch and Ignition switch.
Redo wiring.
Fit 62-67 Beetle rear lights, chrome plating the metal parts of both rear and front lights.
Fit disk brakes
Replace current steel mags and tyres.
Mod the fuel cap assembly to fit flush with the bonnet.
I have given the disk brakes a lot of thought, with all the pro's and con's that have been mentioned in this and other forums. When fitting new rims, I would have to go the adapter route, so the disks can be seen as an more expensive alternative!
Still not quite sure which rims to go for, as I quite like a dished look, and not so much the flush sided look as with most mags.
"What I would suggest is that you draw up a project plan and then prioritise the things you NEED to do linked to the budget you have." by Vader
Truer words have never been spoken...
Truer words have never been spoken...
-
alants
- Oil Pump
- Posts: 251
- Joined: Fri Mar 04, 2011 11:29 am
- What model do you have?: beach bug and '78 Ba
- Facebook: NO
- Location: Cape Town - Table View
- Has thanked: 7 times
Re: My Beamish Bug fixer-upper
I agree with Vader - mine are going to get changed end of the month !vader wrote:I would do the disk conversion in front for various reasons..
1) You do away with the need to constantly adjust the drums.
2) Getting sand/mud in the drums eats the metal away and makes a mess..
3) Chances of you locking up the front wheels is less than on a "modern car". You just need to upgrade the Master Cylinder to a two phase/duel action unit. No need for a brake buster.
4) Stopping distance IMHO is halved with disks.
5) And they look much cooler than the drums..
who dat who say who der when I say who dat ?
-
arnocill

- Oil Pump
- Posts: 213
- Joined: Sun Nov 20, 2011 12:53 pm
- What model do you have?: beamish buggy
- Location: Brackenfell cpt
- Has thanked: 6 times
- Been thanked: 4 times
Re: My Beamish Bug fixer-upper
Which empi 4 into 1 did you get loopy? I am looking to buy the tnt one, apperently its a bit more noisy than the empi but Dave is still waiting on stock.
How about a pick of the motor with all the shiny bits and exhaust? (show me your's and i'll show you mine (once mine is done)
Oh and FFR do offer better prices compared to the Volkspares website
How about a pick of the motor with all the shiny bits and exhaust? (show me your's and i'll show you mine
Oh and FFR do offer better prices compared to the Volkspares website
-
Loopy
- Oil Cooler
- Posts: 318
- Joined: Fri Dec 25, 2009 8:15 pm
- What model do you have?: Beach Buggy
- Location: Brackenfell, Western Cape
- Has thanked: 11 times
- Been thanked: 6 times
Re: My Beamish Bug fixer-upper
How about I come and show you mine, and I'll take a look at yours.....then you can hear how the Empi one sounds! Just stay away from the bling distributer cap, mine lasted all of two weeks....
If it is OK, I'll PM you my phone number? My weekends (nevermind the week!)is a bit hectic, still need to get to HR, and he stays just down the road from me!
If it is OK, I'll PM you my phone number? My weekends (nevermind the week!)is a bit hectic, still need to get to HR, and he stays just down the road from me!
"What I would suggest is that you draw up a project plan and then prioritise the things you NEED to do linked to the budget you have." by Vader
Truer words have never been spoken...
Truer words have never been spoken...
-
arnocill
- Oil Pump
- Posts: 213
- Joined: Sun Nov 20, 2011 12:53 pm
- What model do you have?: beamish buggy
- Location: Brackenfell cpt
- Has thanked: 6 times
- Been thanked: 4 times
Re: My Beamish Bug fixer-upper
Ja dis reg met my, ons maak n date. Dan hoef jy ook nie meer nuuskierig te wees oor my kleur nie
-
Loopy
- Oil Cooler
- Posts: 318
- Joined: Fri Dec 25, 2009 8:15 pm
- What model do you have?: Beach Buggy
- Location: Brackenfell, Western Cape
- Has thanked: 11 times
- Been thanked: 6 times
Re: My Beamish Bug fixer-upper
So, been busy removing a couple of things of the buggy, and also trying my hand at fibreglassing. Seen a couple of pics of buggies with centre consoles, and thought that I'd try my hand at building one.
Made it out of wood, which I thought would be the easiest to start off with
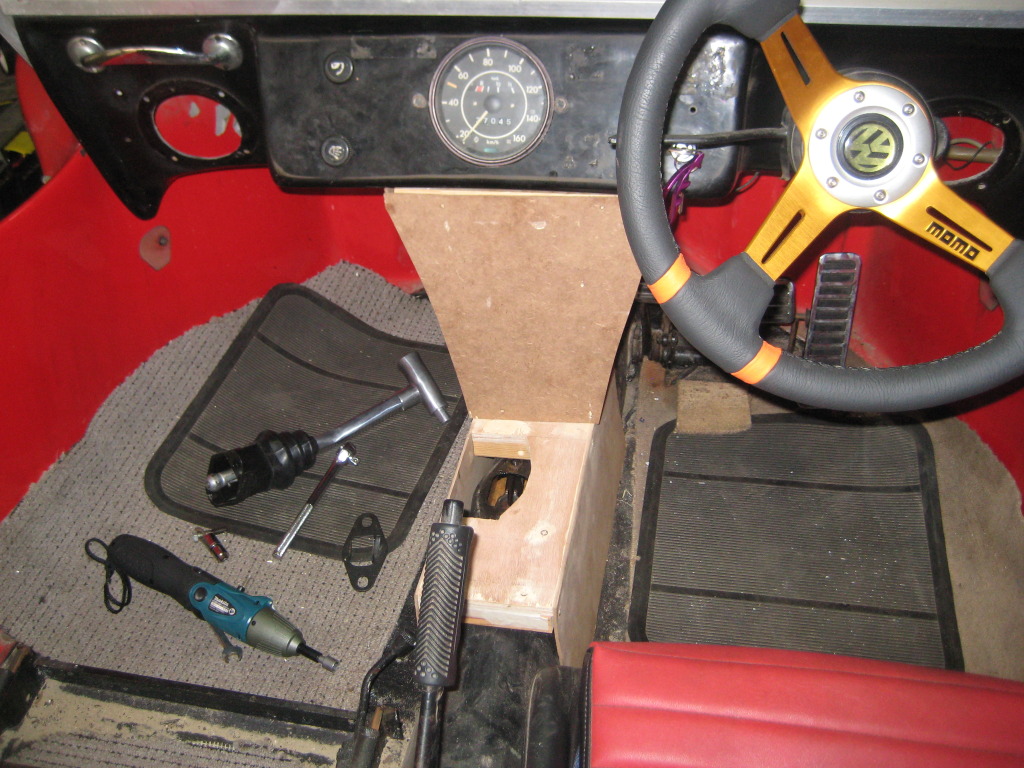
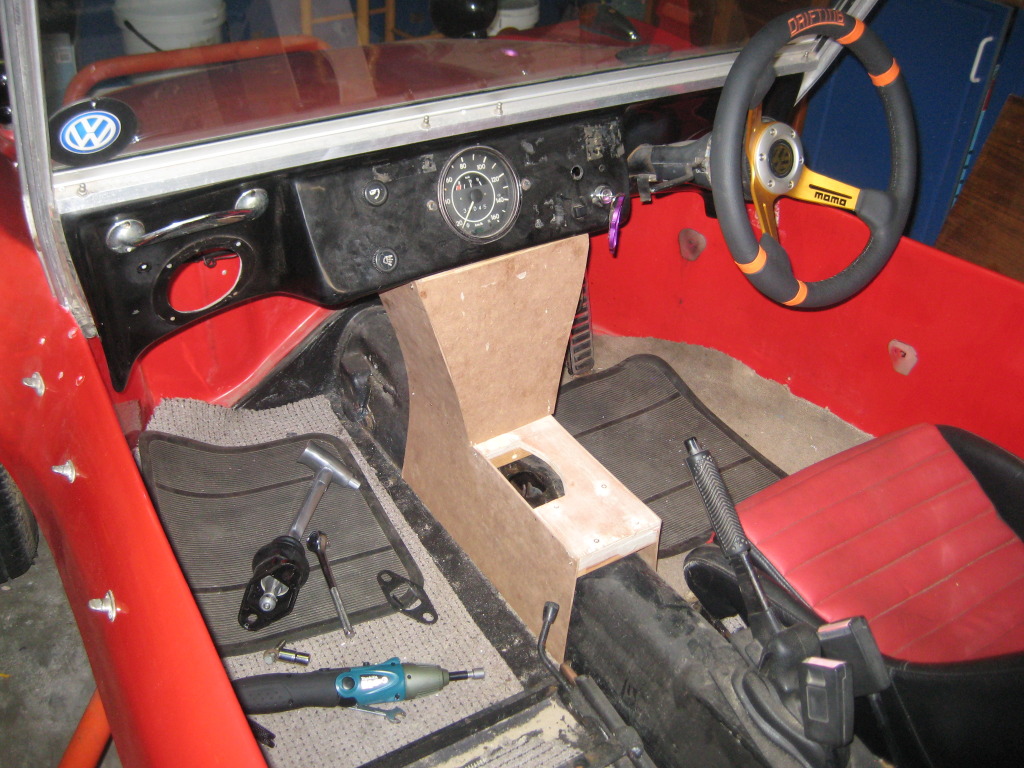
First idea was to make it wide enough at the top to be able to accomodate a normal DIN sized radio slot, but I settled for a somewhat narrower top, as I was afraid that it would intrude on knee space. After a couple of layers of fibreglass, this what it looks like now. Still see it as a "proof of concept", something that can evolve a bit more.


Made it out of wood, which I thought would be the easiest to start off with
First idea was to make it wide enough at the top to be able to accomodate a normal DIN sized radio slot, but I settled for a somewhat narrower top, as I was afraid that it would intrude on knee space. After a couple of layers of fibreglass, this what it looks like now. Still see it as a "proof of concept", something that can evolve a bit more.
"What I would suggest is that you draw up a project plan and then prioritise the things you NEED to do linked to the budget you have." by Vader
Truer words have never been spoken...
Truer words have never been spoken...
-
Tony Z

- Donor

- Posts: 15008
- Joined: Wed Sep 14, 2005 8:33 am
- What model do you have?: 2.3L 69; 1302; P/Van
- Location: Klipheuwel (near Durbanville), Cape Town or working at sea
- Has thanked: 192 times
- Been thanked: 488 times

Re: My Beamish Bug fixer-upper
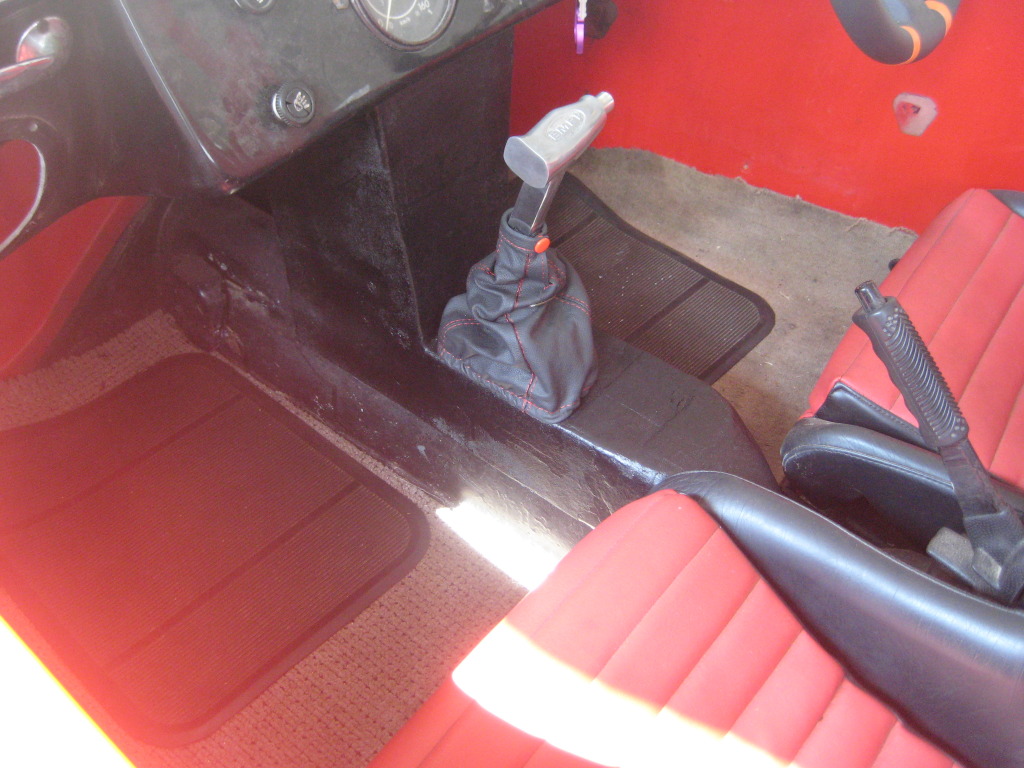
nicely done. I see you left a spot for your clutch foot. This was something I had to do too. What I would suggest is the "front wall" by the gearleaver, you remove that and make it a back wall, then you can make a little compartment for keys, cell phone.... Well thats what I did anyway.
Plus, making it a 2 piece item will allow you to quickly remove it if you ever need to - I have gauges and wiring in mine, so I sometimes have to pull it apart to access everything.
Plus, making it a 2 piece item will allow you to quickly remove it if you ever need to - I have gauges and wiring in mine, so I sometimes have to pull it apart to access everything.
ANGRRR
http://www.aircooledvwsa.co.za/viewtopi ... 23&t=14775
1302S
http://www.aircooledvwsa.co.za/viewtopi ... 23&t=33521
Panel Van
http://www.aircooledvwsa.co.za/viewtopic.php?p=288723
http://www.aircooledvwsa.co.za/viewtopi ... 23&t=14775
1302S
http://www.aircooledvwsa.co.za/viewtopi ... 23&t=33521
Panel Van
http://www.aircooledvwsa.co.za/viewtopic.php?p=288723
vader wrote: The Force is strong with you young Sith Lord Z!
-
Loopy
- Oil Cooler
- Posts: 318
- Joined: Fri Dec 25, 2009 8:15 pm
- What model do you have?: Beach Buggy
- Location: Brackenfell, Western Cape
- Has thanked: 11 times
- Been thanked: 6 times
Re: My Beamish Bug fixer-upper
Thanks, Tony. The idea is to make one or more "cubby-holes" on the upper part, or to make a removable face plate for instruments or switches. Still would like the top slightly wider where it meets the underside of the dash, but the way that I made it with the wooden sides, did not allow it. As I mentioned, this is just a proof of concept test, so might make the following one slightly or very different.
"What I would suggest is that you draw up a project plan and then prioritise the things you NEED to do linked to the budget you have." by Vader
Truer words have never been spoken...
Truer words have never been spoken...
-
buggyfan

- Long Block
- Posts: 2979
- Joined: Wed Mar 12, 2008 2:26 am
- What model do you have?: lwb beachbuggy
- Location: newlands,jhb
- Has thanked: 95 times
- Been thanked: 87 times
Re: My Beamish Bug fixer-upper
any recent updates
http://www.aircooledvwsa.co.za/viewtopi ... tt#p269451" onclick="window.open(this.href);return false;
-
Loopy
- Oil Cooler
- Posts: 318
- Joined: Fri Dec 25, 2009 8:15 pm
- What model do you have?: Beach Buggy
- Location: Brackenfell, Western Cape
- Has thanked: 11 times
- Been thanked: 6 times
Re: My Beamish Bug fixer-upper
If all goes according to plan (LOL and if wishes all came true!!), the buggy will be going in to FFR around March/April for a major revamp. Have ordered a stretched Beamish body, pan will be redone, cage fitted, etc. The look that I'm aiming and hoping for is similar to the Manxter 2+2, hopefully it will work out.
"What I would suggest is that you draw up a project plan and then prioritise the things you NEED to do linked to the budget you have." by Vader
Truer words have never been spoken...
Truer words have never been spoken...
-
buggyfan
- Long Block
- Posts: 2979
- Joined: Wed Mar 12, 2008 2:26 am
- What model do you have?: lwb beachbuggy
- Location: newlands,jhb
- Has thanked: 95 times
- Been thanked: 87 times
Re: My Beamish Bug fixer-upper
@Loopy, if you're getting a stretchedd body ,why the concern about whichsmall battery to use ? On my LWB the battery (619) is in the same pasition where a normal Bugs' battery would be ,under the rear seat,standing on the floorpan
http://www.aircooledvwsa.co.za/viewtopi ... tt#p269451" onclick="window.open(this.href);return false;